🌿 ULTRA-PRACTICAL
Permaculture Zones & Sectors Guide & Design Worksheet
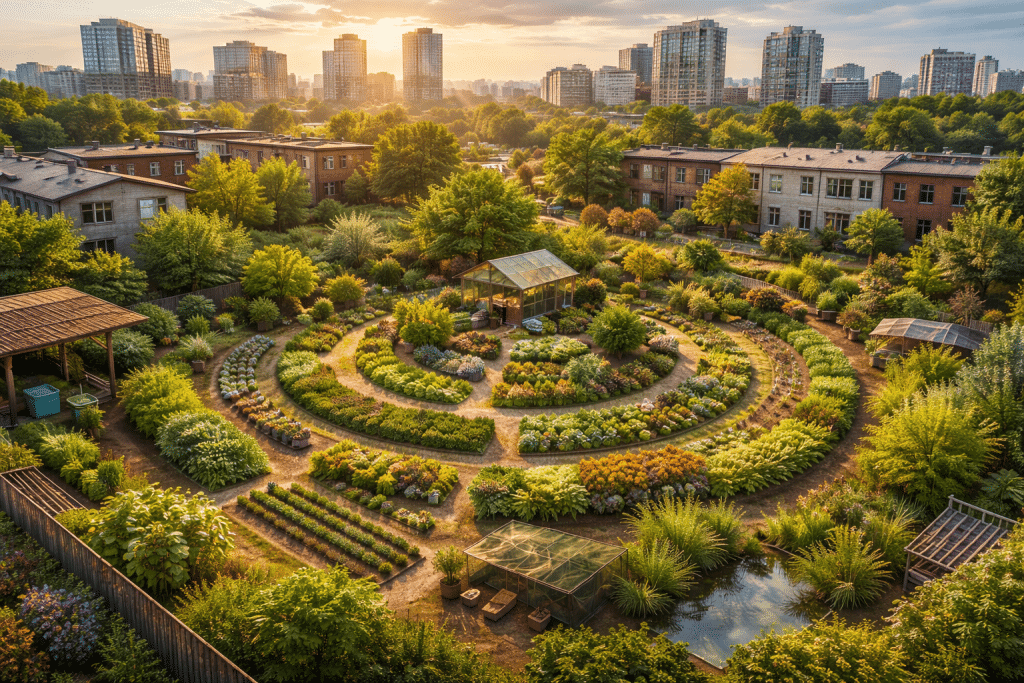
Apartment • HOA Yard • 1–5 Acres
| 15 Key Topics Covered | 3 Layout Examples | 1-Page Design Checklist |
Practical design for real lives — minimizing effort, maximizing yield.

1. Zones 0–5 in Plain Language
Permaculture zones organize your land by how often you visit each area. The golden rule: the more attention something needs, the closer to your door it lives. Stop fighting distance — design with it.
| Zone | Name | Distance from Home | What Goes Here | Visit Frequency |
| 0 | The House | Inside / structure | Kitchen garden on windowsill, sprouts, ferments, indoor herbs | Constantly |
| 1 | Doorstep Zone | 0–10 ft | Daily-harvest herbs, salad greens, culinary plants, compost bucket drop-off, tool hooks | Daily |
| 2 | Kitchen Garden | 10–50 ft | Vegetables, fruit trees, chicken coop, intensive beds, rain barrel | Every 1–3 days |
| 3 | Food Forest / Farm | 50–300 ft | Larger fruit/nut trees, berry rows, grazing animals, main compost pile | Weekly |
| 4 | Semi-Wild | 300 ft – 1 ac | Woodlot, forage plants, coppice, wildlife habitat, firebreak management | Monthly |
| 5 | Wild / Unmanaged | Beyond | Nature reserve, observation only, biodiversity bank, watershed protection | Rarely — observe |
| ✅ Key Insight: Practical Rule: If you can't harvest it on the way back from the mailbox, it's not Zone 1. Zone 1 must be genuinely effortless to visit. |
Small Space Zones
Don't get discouraged by your scale. Zones compress to fit your reality:
- Apartment: Zone 0 = kitchen, Zone 1 = windowsill + balcony, Zone 2 = community garden plot (if you have one)
- HOA Yard: Zone 0 = house, Zone 1 = back door step & herb bed, Zone 2 = vegetable beds, Zone 3 = far corners & fruit trees
- 1–5 Acres: All six zones can exist. Even then, many people only actively design Zones 1–3.
| 📝 Your Turn: Worksheet: Walk your property. Stand at your back door and time yourself reaching each element. Anything that takes more than 30 seconds to reach daily should be a Zone 2 item at minimum. |
2. Sectors: Sun, Wind, Fire, Flood, Noise
Zones tell you HOW OFTEN you visit something. Sectors tell you what FORCES flow through your land from outside. You can't stop sun, wind, or flood — but you can steer, block, or harvest them.
| Sector | What to Map | Design Response |
| ☀️ Sun | Summer vs winter sun arcs, shaded spots at each season | South-facing beds for food; shade trees west of house for cooling |
| 💨 Wind | Prevailing direction, seasonal variation, wind tunnels | Windbreaks on windward side; use wind for passive ventilation indoors |
| 🔥 Fire | Direction fire would approach (downslope/downwind) | Stone/hardscape buffer on fire side; succulent or deciduous plants as firebreak |
| 🌊 Flood/Water | Where water pools, flows, and drains during heavy rain | Route water to swales, rain gardens, tanks; keep paths on high ground |
| 🔊 Noise | Traffic, neighbors, industrial sounds | Dense plantings, berms, or fences as sound buffers on noise side |
How to Map Your Sectors (Step by Step)
- Draw a rough overhead sketch of your property on paper.
- Stand in the center. Observe and mark: Where does the morning sun hit first? Where does it hit last in the afternoon?
- On a windy day, wet your finger and stand at each corner. Note direction.
- In the next rain event, walk your property within 10 minutes of the storm. Map every puddle and flow channel.
- On the noisiest morning (often weekday rush hour), stand outside for 5 minutes. Note direction of loudest sounds.
- If wildfire is a local risk: look at slope and prevailing winds to predict fire approach direction.
| ⚠️ Don't Skip: Sun is your #1 sector. Before you plant a single thing, know where your full-sun, part-sun, and shade zones are in both June and December. These are completely different in many climates. |
3. 'Daily Touch' vs. 'Weekly Touch' Items
One of the most common permaculture mistakes is putting high-maintenance plants in distant zones, then neglecting them. Match your plants and systems to how often you'll realistically visit.
| ⏰ Daily Touch (Zone 0–1) | 📅 Weekly Touch (Zone 2) | 🗓 Monthly / Seasonal (Zone 3–4) |
| Herbs, salad greens, sprouts | Vegetable beds — watering, harvest | Orchard checks, pruning |
| Compost bucket to bin drop-off | Compost turning | Woodlot / coppice management |
| Pet or chicken morning care | Deep watering of fruit trees | Wildlife corridor observation walk |
| Visual pest check (quick scan) | Pest/disease intervention | Swale, berm, or earthwork maintenance |
| Tool grab & return (hook by door) | Tool sharpening & oiling | Seasonal seed saving, replanting |
| 🕐 Time Budget Reality Check: If you have a demanding job or irregular schedule, be brutally honest: design your Zone 1 so it can go 2 days without attention. Use self-watering containers, deep mulch, and drought-tolerant herbs. |
Time Budget Worksheet
- How many minutes per day can you realistically spend in the garden? _____
- How many minutes per week for larger tasks? _____
- Do you have peak busy seasons (tax season, school year, etc.)? _____
- Who else in your household helps, and how reliably? _____
Use these answers to size your Zone 1–2 realistically. A 10-min/day gardener needs a very different Zone 2 than someone with an hour each morning.
4. Micro-Zones for Patios and Balconies
Even a 6×8 ft balcony has micro-zones. The section nearest your door is Zone 1; the far rail or hard-to-reach corners are Zone 2. Design accordingly.
Apartment / Balcony Layout Example
| 🌞 South-Facing Window Window sill herbs (Zone 1) |
| [ BALCONY / PATIO ] — Zones 0–1 Containers: tomatoes, peppers, herbs, dwarf citrus Small worm bin (odor-free) Rain barrel if legal & structural weight allows Tool hook on wall |
| [ KITCHEN ] — Zone 0 Sprout jars | Countertop herbs | Ferment crocks Compost collection pail → empty to green bin or balcony worm bin |
| WIND SECTOR → Install windbreak trellis on prevailing wind side of balcony NOISE SECTOR → Dense foliage wall reduces noise from street side SUN → Shade cloth for intense afternoon sun on west-facing balconies |
Balcony Design Principles
- Place your most-harvested plants (herbs, cherry tomatoes) within arm's reach of the door — this is your micro Zone 1.
- Far rail: larger containers, trellised cucumbers or beans, less-frequent harvest plants.
- Weight matters: check your building's load limit. Wet soil is heavy. Use lightweight potting mix, not garden soil.
- South and west exposures are hottest — use shade cloth in summer. North-facing balconies are challenging for food; focus on shade-tolerant herbs (mint, chives, parsley).
- A small collapsible table doubles as a potting station and can be stored vertically when not in use.
| 🪱 Apartment Composting Tip: Worm bins (Eisenia fetida) are the ideal apartment composter. They produce no odor when managed correctly, fit under a sink or on a balcony, and turn kitchen scraps into the best fertilizer you can get. |
5. Tool Storage Placement for Workflow
Tools belong where you use them, not where they fit. Bad tool storage costs you minutes every session — which adds up to hours per year.
| Zone 1 Tool Station (by back door)
• Hand trowel, pruning snips, harvest basket • Gloves (on a hook, not in a drawer) • Spray bottle for foliar feed or pest spray • Kneeling pad hung on peg Tip: A simple peg board or wall-mounted hooks costs under $20 and saves enormous frustration. |
Zone 2 Tool Station (at shed/garden edge)
• Long-handled hoe, fork, spade • Wheelbarrow stored with handles up for rain • Hose or drip irrigation connections • Compost tools (fork, bulking material) Tip: A small shed or even a weatherproof box at garden edge avoids hauling tools across the yard. |
| 🛠 Workflow Rule: The 'one-trip rule': Every gardening session should require only one trip to get tools. If you're going back inside for something you forgot, your tool station is in the wrong place or stocked with the wrong items. |
Tool Storage by Scale
- Apartment/Balcony: A canvas bag on a hook inside the door holds everything you need — trowel, snips, small fork, twine.
- HOA Yard: A small deck box or outdoor cabinet near the back door. Keeps Zone 1 tools dry and out of sight for HOA compliance.
- 1–5 Acres: Two-station system — Zone 1 station near house, Zone 2–3 station at shed in the field. Never haul shovels across the whole property for Zone 1 work.
6. Compost Placement (Odor + Access)
Compost needs to be close enough that you'll actually use it, but placed thoughtfully so odors and aesthetics don't create conflict with family or neighbors.
| 📐 Placement Formula: The Compost Triangle: (1) Accessible from the kitchen, (2) Accessible from the main garden beds, (3) Downwind from living spaces and neighbor seating areas. Find the spot satisfying all three. |
Placement by Scale
- Apartment: Worm bin under kitchen sink or on balcony. Bokashi bin in a cabinet. Zero outdoor compost needed.
- HOA Yard (1/8 acre): Enclosed tumbler or dual-bin system in back corner, screened by shrubs or a small fence. Must be invisible from street per most HOA rules. No open piles.
- 1–5 Acres: Three-bin turning system 30–80 ft from house, accessible via path from both kitchen and Zone 2 beds. A secondary 'rough compost' pile can exist in Zone 3 for woody material.
Odor Prevention Checklist
- Always cover fresh kitchen scraps with browns (dry leaves, straw, cardboard shreds)
- Never add meat, dairy, or cooked food to open compost — use bokashi or enclosed bin
- Keep pile moist but not soaking — sour smell = too wet + anaerobic
- Turn weekly to add oxygen — this is the single best odor preventative
- Site 10+ ft from property lines and neighbor windows
| 💡 HOA-Friendly Hack: Bokashi fermentation is a game-changer for small spaces and HOA yards. It pre-digests all food waste (including meat/dairy) in an airtight bucket, completely odor-free. Bury the bokashi pre-compost directly in garden beds. |
7. Rain Capture Placement (Where It's Legal)
Rainwater harvesting is one of the highest-value design decisions you can make. Captured water is soft, unchlorinated, and free. But legality varies dramatically by state and municipality.
| ⚠️ Legal Note: Check your state law FIRST. As of 2024: Colorado allows up to 110 gallons per household. Utah, Oregon, and Texas have expanded programs. California allows collection with certain limits. Some states have no restrictions; others have HOA overlays. Google '[your state] rainwater harvesting law' before investing in any system. |
Placement Rules of Thumb
- Place barrels directly under downspouts — this is the only efficient collection point.
- First-flush diverters improve water quality — they divert the first polluted flush from the roof before filling your tank.
- Overflow must drain away from foundation — always have an overflow pipe directed to a rain garden, swale, or lawn.
- Site barrels on a level, firm base — a full 55-gallon barrel weighs 460 lbs. Concrete block or compacted gravel base required.
- Elevation matters: raise the barrel 12–18 inches on a stand for gravity-fed drip irrigation below.
By Scale
- Balcony: Micro-rain capture with a small barrel on a weight-rated balcony. Only if structurally rated. Collect from roof overhang if possible.
- HOA Yard: One or two 55-gallon barrels on downspouts. Many HOAs now permit these if screened from street view. A decorative planter around the barrel can satisfy HOA aesthetics.
- 1–5 Acres: Cisterns (500–2,500 gallons), IBC totes, or in-ground tanks. Can integrate with drip irrigation across Zone 2–3. Pair with swales for passive infiltration across the land.
8. Greywater Caution Notes (Local Codes)
Greywater — water from sinks, showers, and laundry — can legally irrigate certain plants in many states. It dramatically reduces outdoor water use. But the rules are strict and non-compliance can result in fines.
| ⚠️ Critical Disclaimer: Greywater laws vary by state, county, city, and sometimes HOA. Blackwater (toilet waste) is NEVER for reuse. Always confirm your local codes before any installation. |
General Greywater Safety Principles (Most States)
- Never spray — always subsurface or mulch-basin application to avoid aerosols
- Never on root vegetables or leafy greens that contact the ground
- Fruit trees, berries, ornamentals: generally permitted if not contacting edible portions
- Laundry-to-landscape (L2L) is the simplest legal system in many states — look up your state's 'laundry to landscape' permit requirements
- Use greywater-safe detergents only (low sodium, no boron, biodegradable)
- Install a 3-way valve to divert to sewer when greywater is not suitable (after illness in household, bleach use, etc.)
| States with Simpler Rules
• California: Laundry-to-landscape permit-free under certain limits • Arizona: Permit-free for simple systems under 400 gpd • New Mexico: Progressive greywater rules • Montana, Colorado: Check county level |
States with Stricter Rules
• Most of the Southeast and Midwest: Very limited or no residential greywater • HOA overlay: Even where legal, HOA CC&Rs may prohibit • Check: EPA WaterSense, your county health dept, and local extension office |
9. Kids & Pets Safety Flow
A design that creates conflict with kids or pets won't be maintained. Think of child and pet safety as a design constraint from day one — not an afterthought.
Common Hazards to Design Around
- Toxic plants: Rhubarb leaves, foxglove, lily of the valley, nightshade berries, yew — identify and fence or remove near play areas
- Compost: Mold in compost can cause illness in dogs. Use enclosed bins or fence the compost area with a simple wire panel.
- Rain barrels: Must have secure, child-proof lids — drowning risk for toddlers even in small containers.
- Sharp tools: Zone 1 tool station should be at adult height, with snips and trowels stored tip-down or covered.
- Chicken/animal areas: Keep kids and pets supervised around poultry — salmonella risk + animal stress.
Design Flows for Households with Children
- Designate a clear 'play zone' that is separate from the food garden — this reduces trampling and gives kids their own space.
- Create a 'yes space' within Zone 1: a child-friendly raised bed where kids can dig, pick, and experiment freely.
- Use visual cues for kids: colored flags or painted rocks marking 'look but don't touch' plants.
- Make paths wide and clear — narrow winding paths between raised beds invite jumping across beds.
Design Flows for Households with Pets
- Dogs: Fence or cage all seedling beds until established. Lavender, chamomile, and most herbs are dog-safe; onions, garlic, and grapes are toxic.
- Cats: Mesh or chicken wire laid flat on soil prevents digging in beds — cats dislike the texture.
- Chickens (free range): Accept that Zone 1 beds need protection. Use chicken tunnels between beds rather than full free range.
10. Accessibility and Aging-in-Place Ideas
Permaculture designed for accessibility is better design for everyone. Wide paths, minimal bending, and ergonomic tool placement benefit all users and future-proof your garden.
Path Design
- Minimum 36" wide paths on all primary routes — required for wheelchairs, comfortable for crutches or walkers
- 36–42" is ideal to allow passing with garden cart or wheelbarrow alongside
- Avoid uneven stepping stones — use compacted gravel, decomposed granite, or smooth concrete for main paths
- Gentle slopes only on main paths (max 1:12 grade for wheelchair access)
- Lighting on evening-use paths (Zone 1 and kitchen garden area)
Bed Design
- Raised beds at 24–30" height eliminate bending entirely — ideal for those with back conditions or wheelchair users
- Beds no wider than 24" when against a wall, 36" if accessible from both sides — reach without leaning
- Keyhole beds (with a walking notch into the center) allow closer reach to center of larger beds
- Lightweight tools: carbon fiber handles, long-reach grabbers, ergonomic grips reduce joint stress
| Near-Term Upgrades
• Add a bench or seating within Zone 1 for resting • Install grab rails near steps to garden • Use soaker hose or drip — reduces time spent holding hose • Pre-mix potting soil in sealed bags — no heavy mixing |
Long-Term Planning
• Choose self-seeding or perennial crops — less replanting over years • Food forest design reduces annual labor vs annual gardens • Automate watering with timer-based drip systems • Design one-level access route from home to all key Zones 1–2 |
11. Wildlife Corridors vs. Food Protection
Wildlife is an asset and a challenge simultaneously. The goal is not to eliminate wildlife, but to design so that their natural paths don't run through your food production zones.
Wildlife Corridor Design
- Leave a 3–6 ft strip along fence lines or property edges as a 'wildlife highway' — planted with native shrubs, groundcovers, and brush piles
- This corridor channels deer, rabbits, and small mammals around your property edge rather than through your beds
- Native hedgerows (elderberry, native viburnum, hawthorn) provide food and cover for birds — which control insect pests
- Pond or water feature in Zone 3–4 attracts beneficial wildlife (frogs, birds, beneficial insects) away from Zone 2
Food Protection Strategies by Scale
- Apartment/Balcony: Netting or floating row cover over containers for bird protection. Squirrels are the main challenge — physical barriers only.
- HOA Yard: Chicken wire cloches over individual beds, or deer fencing (6–8 ft) around the entire Zone 2 area. Underground hardware cloth for gophers and voles in raised beds.
- 1–5 Acres: Multi-layer protection — deer fence perimeter around Zone 2, predator urine repellent in Zone 3, bird netting over berries and fruit, poultry netting (electric if needed) for livestock.
| 🦉 Free Pest Control: Attract barn owls and hawks with nest boxes and perch poles in Zone 3–4. A single barn owl family consumes 1,000+ rodents per year — eliminating one of the most common garden pest problems for free. |
12. Minimizing Steps (Time Budget Design)
Every unnecessary step in your garden routine is friction. Friction leads to skipped tasks. Skipped tasks lead to dead plants. Time-budget design eliminates friction by making the right action the easy action.
The 'Lazy Path' Principle
Walk your natural path from back door to kitchen garden. Whatever path you instinctively walk — that's where the primary path should be paved, and that's where Zone 1 plants should live. Don't fight your own habits; design with them.
- Compost bucket: Lives in the kitchen, empties to bin on the natural path to the garden. You should pass the compost bin every time you go to harvest.
- Tool storage: On the natural path from door to garden — you grab tools going in and return them going out.
- Water access: Spigot or hose bib within Zone 2. Never carry watering cans more than 10 ft.
- Seating: At the garden edge facing the beds — where you'll naturally pause to observe.
Step Reduction by Task
| Common Task | High-Friction Version | Low-Friction Version |
| Daily herb harvest | Walk to far bed, search tools, harvest, walk back | Snips on hook by door, herbs at step, done in 90 seconds |
| Composting kitchen scraps | Walk scraps to far bin twice daily | Collection pail on counter, dump once/day on garden path |
| Watering seedlings | Unroll hose from garage, water, reroll | Timer-based drip on all seedling beds, check weekly |
| Pest monitoring | Dedicated weekly pest-check walk | Quick visual check integrated into daily harvest walk |
13. HOA-Friendly Permaculture Aesthetics
Most HOA conflicts come from appearance, not function. Permaculture can be completely HOA-compatible when designed with conventional aesthetics in mind, especially in high-visibility zones.
The Front Yard Strategy
The front yard is your HOA interface. Keep it conventionally beautiful — but make every plant earn its place. This is the zone where edibles should look ornamental.
- Blueberries: Beautiful shrub form, attractive fall color, HOA-safe, productive
- Alpine strawberries: Low groundcover, delicate white flowers, dense and tidy
- Kale 'Red Russian' or 'Redbor': Genuinely ornamental, striking color, often sold in garden centers as ornamentals
- Artichokes: Bold architectural statement, approved as ornamental in most HOA gardens
- Dwarf fruit trees in planting strip: Espalier training against fence = tidy, European, professional
- Herb borders: Lavender, rosemary, and thyme are universally accepted by HOAs and highly productive
Design Rules for HOA Compliance
- Mulch everything: Bare soil reads as neglect; thick wood chip mulch reads as professional landscaping
- Keep clear edges: Define your beds with a clean edge — steel, brick, or plastic — regardless of what's planted inside
- No visible infrastructure: Compost bins, rain barrels, utility items must be screened from street view with evergreen shrubs or fencing
- Height rules: Know your HOA's height limits for plantings, especially near property lines and sidewalks
- Label strategically: If asked about an unusual plant, having a small label showing it is a named cultivar often resolves concerns
| 📚 Resource: The Edible Landscape approach (coined by Rosalind Creasy) has been explicitly HOA-approved in thousands of neighborhoods. Your local university extension service may have a free brochure you can share with HOA boards to educate them. |
14. Seasonal Rearranging (Containers, Shade Cloth)
A living permaculture design evolves with the seasons. Plan for movement rather than designing everything as permanent. Flexibility is especially critical in containers and small spaces.
Seasonal Container Movement Plan
| Season | Action | Why |
| 🌱 Spring | Move heat-lovers to south-facing spots; remove shade cloth | Maximize sun for warm-season crops starting |
| ☀️ Summer | Add 30–50% shade cloth on west-facing balconies and beds; move heat-stressed greens into dappled shade | Prevent bolting, sunscald, and heat stress |
| 🍂 Fall | Bring tender perennials inside; cluster containers near house for warmth; plant cool-season crops in Zone 1 | Extend season; protect investment |
| ❄️ Winter | Store empty containers inside or stack and cover; bring citrus/tender plants indoors; identify cold frames and low tunnels | Prevent freeze-crack damage; protect plants |
Shade Cloth Guide
- 30% shade cloth: Ideal for most vegetables in hot climates — reduces heat without blocking too much light
- 50% shade cloth: For cool-season greens (lettuce, spinach) in summer, or west-facing balconies in afternoon sun
- 70%+ shade cloth: Only for shade-obligate plants or as a privacy screen — too dark for food production
- Install on a simple PVC or conduit hoophouse frame — store rolled in winter
Cold Extension Tools
- Row covers (Agribon 19 or 30): Protect Zone 1–2 from light frost; can extend season 4–6 weeks in each direction
- Cold frames: A simple hinged window over a raised bed — free when made from salvaged windows
- Cloches: Individual plant covers; glass bell jars or repurposed plastic jugs for spot protection
- Wall-o-Water: Tepee-style water-filled tubes — allow tomatoes to go out weeks earlier in spring
Layout Examples
HOA Yard (1/8 Acre) Layout
| STREET / FRONT YARD — HOA Zone Ornamental edibles (kale as border, blueberries as shrubs) Mulched beds, no visible compost Polished appearance: No trellises above 4 ft |
| FRONT DOOR / ENTRY PATH — Zone 1 Herb planters flanking door | Salad pot Tool hook by garage or shed near path |
| HOUSE (Zone 0) — Kitchen faces backyard ideally |
| BACK YARD — Zone 2 (primary) Raised beds or intensive in-ground veggie area Rain barrel at downspout (legal in most HOA states) Fruit tree(s) in sunniest spot Chicken coop if allowed — far from property line |
| BACK CORNER — Zone 2–3 transition Compost bin: screened from house + neighbors, downwind Tool shed or storage box Wildlife hedgerow along back fence |
| SECTOR NOTES: Fire sector → keep back fence clear; mulch, not dry grass Wind → plant dense shrubs on N/NW fence for winter wind buffer Flood → back left/right corner swale or rain garden for drainage |
1–5 Acres Zoned Layout (North = Top)
| ← NORTH WIND BREAK (Zone 3–4) Evergreen trees, dense shrubs — 20–40 ft deep Woodlot / coppice on north edge |
| ZONE 4 — Semi-Wild (outer edges) Forage plantings | Meadow | Wildlife corridor strip along fence lines Firebreak managed zone on fire-approach side |
| ZONE 3 — Food Forest / Orchard Fruit & nut trees | Berry rows | Larger compost system Main water storage tank | Grazing paddock (if animals) |
| ZONE 2 — Kitchen Garden Beds Intensive raised beds or no-dig beds Greywater irrigation from laundry (check code) Rain barrel / cistern at downspout Chicken area with electro-net rotation |
| HOUSE / ZONE 0 — Kitchen faces south/east toward garden Path from kitchen door straight to Zone 2 (minimize steps) Tool storage at junction of Zone 1 + 2 path |
| ZONE 1 — Doorstep (10 ft radius) Herbs, salad greens, daily harvest Compost bucket collection point Accessible path: wide, no-trip, smooth for aging in place |
| ZONE 5 — Wild Edge (if acreage allows) Unmanaged woodland, pond edge, or hedgerow Observation only — wildlife reserve ← Site on lowest point / drainage outlet |
| 🛤 Path Priority: On 1–5 acres, always design your primary path system before planting. Paths define zones in practice, not theory. A good path is wide enough for a wheelbarrow, firm enough for wet days, and runs in straight or gently curved lines for efficient movement. |
15. The 1-Page Design Checklist
Use this before finalizing any design. Print it, tape it to your shed wall, or keep it in your garden journal.
| SITE ANALYSIS |
| □ Walked the site at different times of day |
| □ Mapped sun path (summer + winter) & shaded areas |
| □ Identified prevailing wind direction and season |
| □ Located low spots where water pools |
| □ Noted noise sources and their direction |
| □ Identified fire approach direction (if applicable) |
| ZONES ASSIGNED |
| □ Zone 0–1 items identified (daily use) |
| □ Zone 2 beds/trees planned (every few days) |
| □ Zone 3–4 elements mapped (weekly/monthly) |
| PRACTICAL SYSTEMS |
| □ Compost sited: accessible from kitchen + Zone 2, downwind |
| □ Tool storage placed on most-used route |
| □ Water capture planned (check local legality) |
| □ Greywater reuse checked against local code |
| □ Rain garden or swale sited at lowest point |
| SAFETY & ACCESS |
| □ Kid/pet exclusion zones fenced or planted |
| □ Toxic plants noted and labeled |
| □ Wide paths (36"+ for mobility aids) on main routes |
| □ Seating within Zone 1–2 for rest |
| HOA & AESTHETICS |
| □ Front yard is tidy, mulched, and conventionally readable |
| □ Edibles integrated with ornamentals at street view |
| □ No visible compost bins from street |
| SEASONAL PLAN |
| □ Container/shade cloth rotation schedule noted |
| □ Tender plants have identified winter storage spot |
| □ Summer shading for hot west/south exposures planned |
| WILDLIFE |
| □ Wildlife corridor preserved or created |
| □ Food garden has protection (netting, caging, fencing) |
| □ Water source for wildlife placed near Zone 3–4 |
| 🌱 Final Word: You don't need to check every box before starting. Start with Zones 0–1 only. Get those working beautifully, then expand outward. Perfect is the enemy of planted. |
Design your life into your land — not your land into a magazine photo.
Practical. Productive. Permanent.