Improved Disaster Preparedness by Making Informed Decisions

Why Disaster Preparedness IS Part of Self-Sufficiency
The myth of “It won’t happen here”—and why betting on luck is not a survival plan.
This lesson has been made permanently public to help those in need. It’s a detailed, stand-alone resource designed to support anyone looking to improve their disaster preparedness. You can access it freely anytime — it’s not going anywhere.
Let’s get one thing straight right out of the gate: disaster preparedness isn’t about living in fear. It’s about living with confidence—the kind that comes from knowing you’ve planned for the worst, so you can keep thriving no matter what the world throws at you.
The truth is, we’re living in a time when natural and human-made disasters are becoming more frequent, more intense, and less predictable. Wildfires are burning hotter, floods are rising higher, and storm seasons are stretching longer. Meanwhile, our tightly wound supply chains and aging infrastructure mean a single factory explosion, chemical spill, or grid failure can ripple across the entire country within hours.
Most folks don’t think about these things until it’s too late. But not you. You’re here because you’re building a life rooted in resilience, not convenience. That means thinking ahead—not just about what to grow, build, or stock—but about what could go wrong and how to stay standing when it does.
Preparedness isn’t a one-size-fits-all plan. A homesteader in Florida isn’t dealing with the same threats as one in Montana. That’s why this lesson isn’t just a list of gear or tips (though you’ll get plenty of those). It’s about helping you learn to assess your own location, lifestyle, and risks so you can make clear-headed decisions when it matters most.
And no, it’s not about hoarding beans and toilet paper. It’s about:
-
Knowing what kind of disasters are most likely where you live (or might want to live)
-
Planning for specific scenarios—from fires and floods to grid-down events and civil unrest
-
Protecting your people, your supplies, and your sanity when emergencies hit
-
And staying in the driver’s seat when everyone else is losing their minds
So whether you’re brand new to homesteading or already knee-deep in chickens and root cellars, this is the lesson that ties it all together. Food storage, water systems, backup power, security, communications—it all comes into play here.
You don’t need to be scared of what’s coming—you just need to be ready.
And after this lesson, you will be.
Assessing Your Risk: Know What You’re Up Against
If you don’t know your enemy, how can you prep for it?
Disasters don’t hit every region the same way, and there’s no universal “off-grid checklist” that works for everyone. That’s why this part of the lesson is about helping you do a proper risk assessment—so your prep is smart, targeted, and realistic for your situation.
This is your chance to look danger in the face, do your homework, and build your systems to withstand what’s most likely to come knocking at your door.
1. Understanding Regional Threats
Every climate and geography comes with its own flavor of chaos:
-
Tornado Alley? You’ll want underground shelters, reinforced roofs, and tight emergency drills.
-
Coastal Gulf or East Coast? Think hurricane-proofing, flood planning, and evac routes.
-
West Coast? Earthquake kits, firebreaks, and flexible utility systems are your best friends.
-
Drought-prone regions? Water security just became your top priority.
-
Urban fringe or industrial zones? Add chemical spills, train derailments, or social unrest to the prep list.
Your job: Learn what nature (and infrastructure) has historically done—and will likely do again.
2. How to Research Threats Before Buying Property
Buying land? This is where you really put on your critical thinking hat. A beautiful view means nothing if it floods every three years or is surrounded by flammable brush.
Here’s where to look:
-
FEMA Flood Maps: msc.fema.gov — Check if your dream land is in a floodplain or close to levees.
-
USGS Earthquake & Soil Data: usgs.gov — Look at seismic activity, fault lines, and landslide potential.
-
State Fire Maps: Check your state forestry or wildfire agency for fire risk zones.
-
NOAA Climate Data: ncei.noaa.gov — Historical weather patterns, storm records, drought trends.
-
Talk to Locals: The most reliable information often comes from people who’ve lived there for 20+ years. Ask what disasters they’ve seen and what seasonal issues are common.
-
Check Local Zoning & Infrastructure: Old dams, outdated power lines, leaking chemical plants? You want to know before signing.
If you already own land, do this retroactively and audit your location against likely scenarios.
3. Don’t Forget the Human-Caused Disasters
Not all disasters come from nature. Some are made by people cutting corners or just plain failing to think ahead.
-
Grid Failures: From winter storms in Texas to cyberattacks on power plants—be ready to go dark.
-
Industrial Accidents: Refineries, train depots, and chemical plants often sit near rural and suburban zones.
-
Civil Unrest or Supply Chain Collapse: Economic shocks, protests, or shutdowns can trigger shortages, blocked roads, or worse.
-
Nuclear Risk Zones: Even decommissioned plants can leak or be targets. Know where your nearest one is.
4. Climate Trends and Long-Term Risk Mapping
Even if an area seems safe now, climate change is shifting the rules.
-
Drought creeping into new areas?
-
Longer fire seasons with higher fuel loads?
-
Rising storm intensity, even outside the tropics?
Look for regional trend data, not just past weather patterns. What was safe 20 years ago might be high-risk now.
And don’t overlook the migration effect—as people flee cities or hot zones, rural properties could suddenly find themselves crowded or overburdened. The more you know, the better you can future-proof your homestead.
Final Word on Risk Assessment:
This isn’t about being paranoid—it’s about being strategic.
You’re not just building a beautiful off-grid homestead—you’re building a fortress of abundance. And a fortress starts with knowing what it needs to withstand.
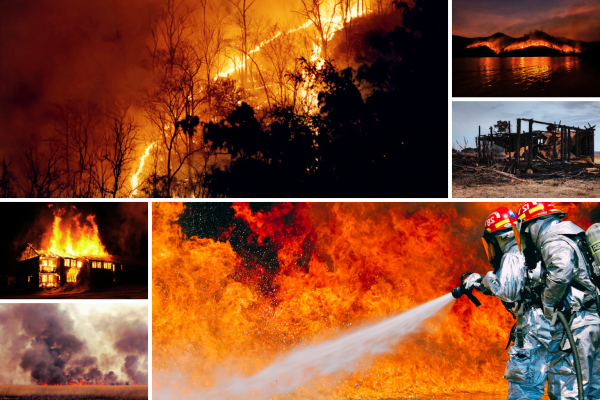
Wildfires: Defend Your Land, Protect Your Life
Wildfires don’t care if you live in a city, a forest, or a humble off-grid Eden—they’ll take it all if you let them.
In many parts of North America, wildfire season is no longer a season—it’s nearly year-round. Droughts, mismanaged forests, and hotter temperatures have made fires faster, stronger, and less predictable. And for homesteaders, it’s one of the most serious threats, because unlike a city dweller, you can’t just evacuate and wait it out. You’ve got land, animals, food, gear, and years of sweat equity on the line.
But don’t panic. Plan.
Understand Your Wildfire Risk
Start with a wildfire risk assessment:
-
Are you in a fire-prone state or region (California, Texas, Oregon, Montana, New Mexico, etc.)?
-
Is your land forested, on a hillside, or surrounded by tall grass, scrub, or brush?
-
Do you have only one road in and out?
-
How close are your neighbors, and what’s their fire readiness like?
-
Do local agencies conduct controlled burns or offer fire maps?
Check with your state forestry department or local fire marshal for historical fire activity and real-time data.
Create a Defensible Space Around Your Homestead
Your best fire protection starts with landscaping. The concept is called "defensible space", and it's required in many wildfire-prone regions.
Divide your property into zones:
Zone 1: 0–30 feet from buildings
-
Remove dead plants, leaves, and pine needles.
-
Keep grass cut low.
-
Avoid wood mulch near the home; use gravel or bare soil instead (Although bare soil will never stay bare).
-
Trim tree branches at least 10 feet away from structures and remove any that hang over roofs.
-
Store firewood at least 30 feet away from your home.
Zone 2: 30–100 feet
-
Thin trees and bushes so fire has less fuel.
-
Keep space between tree crowns to avoid a continuous canopy.
-
Remove "ladder fuels" (small plants that help fire climb from ground to canopy).
Zone 3: 100+ feet
-
Maintain trails, firebreaks, or grazed areas.
-
Consider planting fire-resistant species that act as green buffers.
Harden Your Home & Outbuildings
Wildfires don’t just burn—they throw embers miles ahead of the flames. Most homes catch fire from flying embers, not direct flame. Here’s how to armor up:
-
Metal roofing or Class A fire-rated shingles – no wooden shakes.
-
Spark arrestors on chimneys.
-
Cover vents and eaves with ⅛-inch metal mesh.
-
Use non-combustible siding like fiber cement, metal, or stucco.
-
Install double-paned or tempered glass windows to resist heat.
-
Keep gutters and roofs clear of dry leaves and pine needles.
-
Use metal mesh or fireproof screens over openings like skylights or decks.
-
Avoid storing fuel, hay, or propane tanks near any structures.
Bonus tip: Paint structures with intumescent paint (fire-retardant coating that expands when exposed to heat).
Install Fire-Resistant Water and Power Systems
-
Keep water storage tanks accessible with fire hoses.
-
Install outdoor hose hookups on all sides of buildings.
-
If you use solar: store batteries in fire-resistant boxes or underground.
-
Clear vegetation around power sheds and generator enclosures.
If possible, install a backup pump that runs independently of the grid (solar-powered or hand-pump) so you can still use your well in a fire.
Emergency Evacuation Planning
Even if you plan to stay and defend, always be ready to leave:
-
Two evacuation routes mapped and cleared.
-
Bug-out bag with essentials (ID, cash, meds, water, maps, comms).
-
Livestock plan: trailer? release? emergency pasture? Have a written plan and practice it.
-
Family communication plan in case cell service is down.
-
Keep important documents in a fireproof, portable safe.
Pro tip: Practice fire drills in real time. Set a timer and see how fast you can pack out people, animals, and essentials.
Suppression & Defense Tools to Keep on Hand
For those who choose to stay and defend (not always recommended!), here are some basics to have:
-
100–300 feet of fire hose that fits your water system
-
Shovels, rakes, Pulaskis, and McLeods (wildland firefighting tools)
-
Backpack water sprayer
-
N95 or P100 masks (smoke protection)
-
Wool blankets (don’t melt in heat)
-
Fire shelters (last-resort gear)
-
Fire retardant gel or foam to apply to walls or brush in advance
Only attempt to fight fire if you are trained, healthy, and the fire is small and manageable. Your life is worth more than your homestead.
***Get It Wet: Drench the Danger Before It Arrives
One of the simplest yet most powerful ways to protect your homestead from an advancing wildfire? Soak everything. Not just a little sprinkle—drench it like it owes you money.
If the fire’s on its way and you’ve already cleared defensible space, your next move is to turn the whole place into a soggy, muddy, fire-resistant fortress.
Here’s how:
-
Turn on sprinklers across your roof, garden, fencing, and animal structures.
-
Douse porches, decks, and outer walls with water.
-
Soak the ground—turning the dry brush and lawn into a sponge.
-
Hose down animal pens, barns, sheds, greenhouses, and any wooden infrastructure.
If you're in a wildfire-prone region, install an automated or manual perimeter sprinkler system as part of your fire defense plan. You can connect it to a water storage tank or your main supply with a dedicated pump, so it activates even during grid failures. You want to soak, collect livestock and people and evacuate, not waste time scrambling with hoses when the flames crest the ridge. Yes, you need to consider your livestock in your evacuation plan too.
Pro tip: Keep gas-powered pumps on hand for pressurizing water from tanks or ponds if the power goes out (which it probably will).
***Pre-Burning: Fireproof with Fire
This might sound counterintuitive, but hear us out—burn it now so it won’t burn later.
Wooden structures like fence posts, garden beds, poles, and even timbers used in off-grid builds can be pre-charred in a controlled environment to make them less flammable in the long run. This ancient Japanese method, known as Shou Sugi Ban, involves scorching the outer layer of wood. It does three things:
-
Hardens the surface and makes it more fire-resistant.
-
Closes the wood pores, reducing moisture penetration and rot.
-
Discourages pests like termites and beetles.
You can pre-burn wood:
-
Before installing fencing or outdoor features.
-
As part of seasonal maintenance (especially for anything close to Zone 1).
-
To restore and toughen up old timber that’s been exposed to sun or wear.
If you’re building or replacing structures in a high-risk area, this technique is well worth your time. Just make sure to seal the charred wood with natural oils or fire-safe finishes to prolong its durability.
After the Fire
Surviving the fire is one thing. Rebuilding afterward is another:
-
Check for hot spots and flare-ups for days afterward.
-
Test water quality if you use surface water or rain catchment (ash and chemicals can contaminate).
-
Watch for soil erosion—you may need to reseed or install silt fencing to prevent landslides.
-
Contact local agencies about assistance or grants for rebuilding.
Final Thoughts
Wildfires are fierce, fast, and terrifying. But they’re also survivable—with the right land design, gear, and mindset. This is one of those places where your investment in prevention pays off way more than trying to play hero in the middle of a blaze.
You’re not just homesteading—you’re building a sanctuary that can stand through fire.
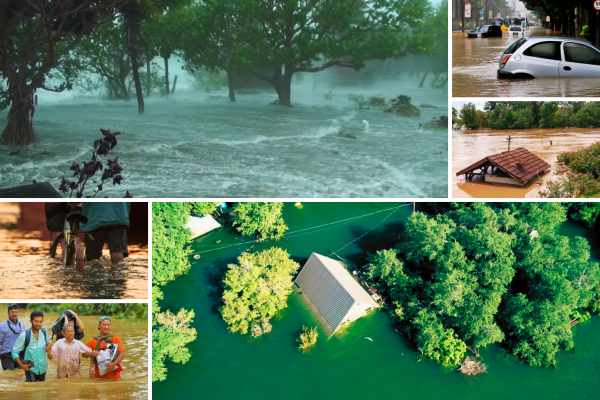
Floods and Flash Flooding: When Water Turns Against You
You might love a good rain when the garden needs it—but when the skies open up too fast or the rivers start creeping beyond their banks, floodwater becomes one of the most destructive and underestimated threats to any homestead.
Floods are sneaky. They often give little warning and don’t care if you’re off-grid or on. One minute your property is soggy but manageable, the next your orchard is a swamp, your basement is a swimming pool, and your entire year’s food supply is under three feet of muddy water.
But with the right planning, awareness, and good design, you can protect your land, home, and systems from water damage—and even design your homestead to work with water rather than fight it.
Types of Flooding to Watch Out For
Before we jump into strategy, know what you're up against. Not all floods look the same:
-
Flash Floods: Sudden, intense rainfall overwhelms the land’s ability to absorb it. Common in hilly or urban-adjacent areas with poor drainage.
-
River Flooding: Occurs when rivers or streams swell beyond their banks from long or heavy rainfall upstream.
-
Coastal Flooding: Saltwater storm surge from hurricanes or sea-level rise affects coastal properties.
-
Urban Overflow: Poor municipal drainage backs up into rural or edge-of-town homesteads.
-
Sheet Flooding: Flat land slowly fills with water after sustained rainfall, often in clay soils or poorly drained plains.
How to Assess Your Flood Risk
To make informed decisions, you need intel:
-
Topography: Know the high and low points on your land. Low spots collect water—use contour maps, Google Earth elevation data, or a laser level to survey.
-
Flood Zone Maps: Check FEMA flood maps, or local watershed district maps, to understand how often your area floods.
-
Soil Type: Sandy soils drain fast. Clay soils turn into soup. Know what you’re working with.
-
Past Events: Talk to neighbors. Look up news archives. If the area has flooded in the past, it’ll flood again.
-
Nearby Dams, Levees, or Rivers: Any upstream infrastructure failure can quickly affect you downstream.
Design Strategies for Flood-Resistant Homesteads
These practices reduce damage, protect infrastructure, and help water pass through without wrecking your systems:
Site Your Structures Wisely
-
Build homes, sheds, and storage on higher ground.
-
Raise floors with pier-and-beam or post foundations.
-
Keep solar batteries, inverters, and panels mounted above flood level.
Use Swales, Berms, and French Drains
-
Swales catch and redirect water on contour—ideal for slowing runoff and preventing erosion.
-
Berms (raised earth mounds) can form protective barriers around buildings or gardens.
-
French drains carry water away from buildings using gravel and pipe under the surface.
Plant Water-Absorbing Species
-
Trees and deep-rooted plants like willow, elderberry, or comfrey can soak up excess water.
-
Dense groundcovers and mulch slow erosion and improve infiltration.
Gravel and Mulch Paths
-
Avoid paving near structures. Use gravel, wood chips, or permeable surfaces to help absorb water.
Rainwater Management
-
Use large overflow pipes or spillways on rainwater catchment tanks.
-
Keep water tanks elevated or anchored—a floating water tank can crush a fence or flip over dangerously.
What to Do When a Flood Is Imminent
-
Move livestock to higher ground—before the water gets too deep.
-
Secure water, fuel, and food stores—elevate everything possible.
-
Unplug electronics and shut down your power systems, especially if you have basement battery banks or inverters.
-
Use sandbags or water barriers around doorways and structures.
-
Have a boat or raft? Store it ready. If not, build a flood-worthy bug-out route to higher ground.
After the Flood: Safe Recovery
-
Don’t use any flooded water source (wells, rain barrels) until tested or sterilized.
-
Toss any food stored below flood level—even canned food may have damaged seals.
-
Inspect electrical and fuel systems before restarting.
-
Look for soil erosion, foundation damage, or root rot in trees and crops.
Floods can be devastating—but if you know your land and plan your systems well, you can come through soggy but safe. Some homesteads even use flood seasons to recharge swales and ponds with fresh water. When you design for water, you design for resilience.
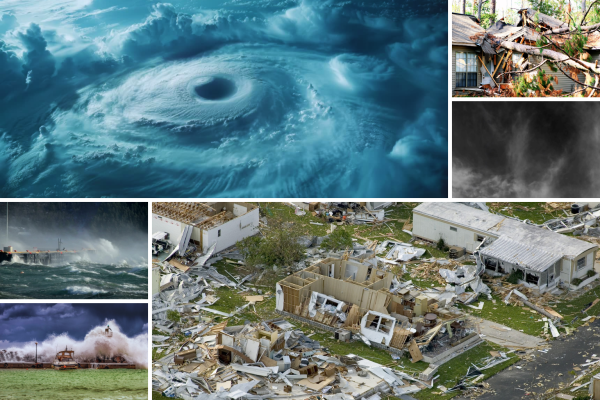
Hurricanes & Tropical Storms: Weathering the Big One Off-Grid
When hurricanes or tropical storms roll in, they bring more than just strong winds—they unleash torrential rain, storm surges, extended power outages, and chaos. For off-grid homesteaders, especially those living in coastal or southeastern regions, hurricane preparedness is more than a seasonal task—it’s a survival strategy.
Whether you’re building from scratch or living in an existing homestead, this section gives you the knowledge to reinforce your home, protect your animals, and ride out the storm with confidence.
Understanding the Threat
Hurricanes are massive storm systems that can span hundreds of miles. While most people worry about the wind (and they should!), most damage comes from:
-
Storm surge: A rising wall of seawater that floods everything in its path
-
Heavy rainfall: Causes flash flooding and mudslides
-
Tornadoes: Often spin off from hurricanes inland
-
Power outages: Can last days or even weeks in rural areas
-
Access cut off: Roads may flood, bridges can wash out
Tropical storms bring similar risks, just with slightly lower wind speeds—don’t underestimate them.
Before the Storm: Preparation Essentials
🏠 Structural Fortifications
-
Reinforce your roof: Use hurricane clips or straps to secure it to the walls.
-
Install storm shutters or pre-cut plywood panels for all windows and glass doors.
-
Seal the perimeter: Use weatherproof caulking around doors and windows to prevent water intrusion.
-
Check your drainage: Make sure gutters and ditches are cleared to reduce flooding risk.
🌧 Water Management
-
Elevate critical systems like batteries, electronics, and stored food in case of flooding.
-
Install french drains or swales to divert water from structures.
-
Use sandbags or earth berms as temporary levees around vulnerable entry points.
🧰 Backup Power & Essentials
-
Charge batteries and test your solar or wind backups.
-
Have a manual water pump or gravity-fed system ready in case pressure tanks fail.
-
Stock emergency fuel in sealed, well-ventilated containers.
-
Fill water storage tanks and containers well ahead of time—municipal supplies may shut down.
🐔 Livestock and Animals
-
Move animals to high ground, especially chickens, rabbits, and goats in low pens.
-
Secure fencing to prevent escape or injury during the storm.
-
Keep feed dry and covered, ideally stored in weatherproof barrels.
-
Consider a backup enclosure in a sheltered barn or shed with strong anchors.
🧭 Evacuation Plan
-
Know your evacuation zone and routes—especially if you’re near the coast or a floodplain.
-
Store important papers, maps, and contact lists in a waterproof grab-and-go bag.
-
Practice loading your animals and family for evacuation at least once.
During the Storm: Stay Put, Stay Safe
-
Shelter indoors away from windows. Interior rooms or root cellars are best.
-
Turn off power in flooding areas to prevent electrical fires.
-
Monitor weather via battery-powered radio or solar emergency system.
-
Do not venture outside, even during the “eye” of the storm—it’s deceptively calm and dangerous.
-
Keep animals indoors or locked down in pre-secured shelters.
After the Storm: Assess and Recover Safely
-
Inspect structures for damage before reentering or turning on utilities.
-
Beware contaminated water—test before drinking, even from stored sources.
-
Watch for downed lines, snakes, and debris while cleaning up.
-
Dry and sanitize flooded tools, food storage, and animal areas.
-
Document damage if insurance is involved, even off-grid policies.
Pro Tips for Homesteaders in Hurricane Zones
-
Bury backup power and water lines to protect from wind/flood damage.
-
Build multi-use storm shelters that double as root cellars or storage rooms.
-
Anchor outbuildings, solar panels, and wind turbines to withstand 120+ mph gusts.
-
Practice drills regularly—especially if you have children or animals.
Final Thought
You can’t stop a hurricane—but you can outsmart it. By designing your homestead with hurricanes in mind, stocking up early, and knowing when to hunker down or get out, you’ll be one step ahead of the storm every time.
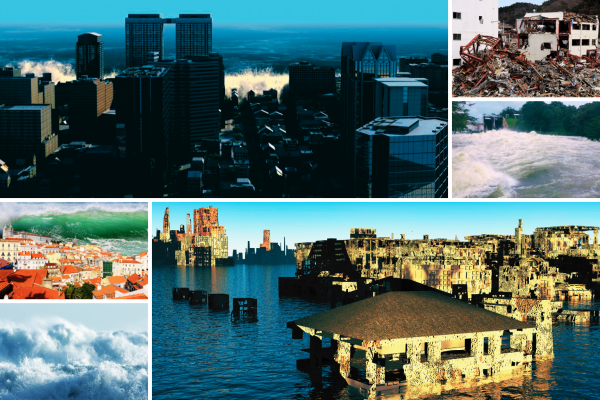
Tsunamis: Outrunning the Ocean and Reclaiming the High Ground
Tsunamis are not giant surf waves. They’re massive walls of water caused by underwater earthquakes, volcanic eruptions, or even landslides. While they usually impact coastal regions, they can travel hundreds of miles inland through rivers, estuaries, and low-lying terrain. If you’re homesteading near the ocean or along a coastal river system, tsunamis need to be part of your long-term risk assessment.
Tsunamis are rare—but when they hit, they don’t just wipe out homes… they erase entire landscapes.
Understanding the Risk
Tsunamis are triggered by major events that displace massive volumes of water. The most common causes include:
-
Undersea earthquakes, especially subduction zones (like the Cascadia Subduction Zone off the Pacific Northwest coast)
-
Volcanic eruptions (Hunga Tonga, Krakatoa)
-
Landslides (underwater or coastal cliffs collapsing into water bodies)
-
Glacier calving into fjords
What makes tsunamis so dangerous is how they behave:
-
They move up to 500–600 mph in deep water—faster than a jet plane.
-
As they reach shore, they slow down and rise up, forming surges that can tower dozens of feet high.
-
Often, the first sign isn’t a wave—it’s the ocean pulling back, revealing exposed seafloor.
And remember, the first wave is rarely the last—many tsunamis come in series, with larger waves following smaller ones over several hours.
Before the Wave: Know, Plan, and Build to Survive
-
Know your elevation.
-
If your homestead is within 1–2 miles of the ocean, especially near sea level, you must know your property’s exact elevation.
-
Use topographic maps or GPS apps to find your elevation and identify safe high-ground locations nearby.
-
-
Study tsunami risk zones.
-
Use NOAA tsunami maps or state/local hazard planning tools to determine if your area is within a tsunami evacuation zone.
-
If you’re shopping for coastal property, prioritize land above 100 feet elevation and not in floodplain zones.
-
-
Build defensively.
-
If you must build in a tsunami zone, use elevated platforms, reinforced concrete, and sacrificial lower levels.
-
Planting dense wind- and water-resistant vegetation near coastlines (like mangroves or salt-tolerant shrubs) can reduce wave energy in some areas.
-
-
Create a “vertical evacuation” plan.
-
Identify the closest high ground and shortest path to it. Time yourself walking it.
-
If there’s no high ground nearby, consider reinforcing an upper story or rooftop for short-term survival until rescue.
-
-
Sign up for tsunami alerts.
-
NOAA Weather Radio, the Pacific Tsunami Warning Center, and local emergency texts can provide early warnings.
-
When the Wave is Coming: Evacuate. No Exceptions.
-
If the earth shakes, move fast.
-
If you feel a strong earthquake and you’re near the coast, do not wait for an official warning—assume a tsunami is coming and get to high ground immediately.
-
Don’t wait to gather belongings or check on the internet. You may have minutes.
-
-
If the ocean pulls back—run.
-
A sudden receding of the ocean is a massive red flag. It means the tsunami is about to arrive.
-
Get uphill or inland fast. Don’t stop to take photos. Don’t go down to see the beach.
-
-
Stay away until all-clear is given.
-
After the first wave, many people think it’s safe and return… only to be caught by the second, larger wave.
-
Listen to emergency channels or NOAA radio for the all-clear. It could take hours.
-
After the Surge: Assessment and Recovery
-
Flood contamination is a serious issue.
-
Saltwater, sewage, fuel, and industrial waste may have mixed with your land, well, or garden. Test water sources and avoid planting edibles in affected soil until it’s been remediated.
-
-
Structural damage may not be visible.
-
Buildings can be undermined or shifted on their foundations by the water force. Don’t re-enter until inspected.
-
-
Be cautious with debris.
-
Rusted metal, downed wires, and displaced wildlife (like snakes or sea creatures) can make cleanup dangerous.
-
-
Plan to relocate if needed.
-
In some tsunami-hit regions, rebuilding on the same site isn’t safe or legal. Always have a backup land plan—even if you never use it.
-
Final Thought: You Can’t Outrun a Tsunami, But You Can Outsmart It
Tsunamis are terrifying, yes—but they’re also one of the most predictable disasters in terms of geography. If you're living or planning to live in a coastal area, build your plan before you build your homestead. Once the ocean moves, it’s too late.
But with smart planning, awareness, and a dash of humility, you can live near the sea safely, with your eyes open and your evacuation route clear.
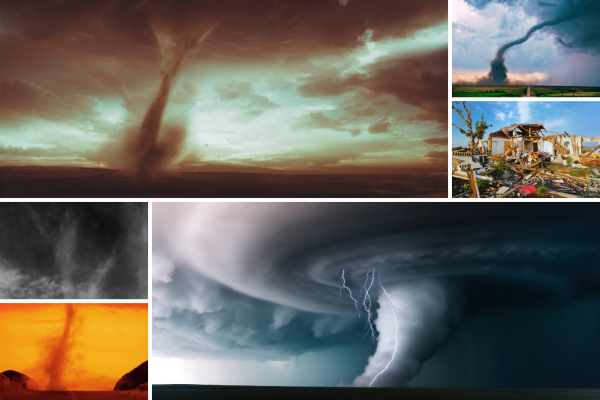
Tornadoes: Twisters, Microbursts, and Staying Grounded in the Storm
Tornadoes are nature’s version of an angry drill—tight spirals of wind that can tear buildings apart, hurl debris like missiles, and flatten entire homesteads in seconds. While they don’t last long, their effects do. If your off-grid setup is in tornado country (think much of the Midwest, South, and central Plains), you must prepare as if your life depends on it—because it just might.
And it’s not just full-on tornadoes. Microbursts and straight-line winds—downdrafts with hurricane-level force—can cause similar damage without the swirling motion. This section helps you prepare, protect, and recover—while keeping your people, livestock, and supplies safe.
Understanding the Threat
Tornadoes can touch down with little warning, usually between March and August, but anytime conditions are right. They form when warm, moist air collides with cold, dry air, often during thunderstorms. Here’s what makes them particularly dangerous:
-
Wind speeds can exceed 200 mph in severe cases.
-
They can appear any time of day, but most strike in late afternoon or early evening.
-
Path widths range from a few yards to over a mile.
-
Even weaker tornadoes can flip vehicles, destroy sheds, and kill livestock.
-
Microbursts can knock out trees, blow roofs off, and crush gardens without spinning funnels.
Before the Storm: Preparedness for Tornado Country
🧱 Structural Protection
-
Anchor your home and buildings to the foundation with hurricane/tornado straps.
-
Reinforce roofs, doors, and windows—especially large barn doors.
-
Keep tools, fencing, panels, and loose outdoor equipment tied down or stored inside.
-
Install storm shutters or keep plywood cut and ready to cover windows.
⛑ Build or Retrofit a Shelter
-
Best option: An underground storm shelter or root cellar that doubles as a tornado bunker.
-
Second best: A reinforced interior room with no windows (like a closet or pantry) on the lowest floor.
-
Above-ground safe rooms are acceptable if built to FEMA standards (able to withstand EF-5 winds).
📻 Tornado Alerts and Communication
-
Set up NOAA weather radios with battery or solar backup.
-
Sign up for text alerts if cellular works in your area.
-
Practice emergency communication with neighbors, family, and community.
🐐 Animal Safety
-
Pre-identify sheltered areas for livestock: concrete-walled barns, reinforced sheds, or below-grade pens.
-
Consider creating a dugout livestock trench (if possible) with cover for emergencies.
-
Tag or mark animals clearly in case they escape.
-
Keep extra feed and water stored in multiple locations.
🧳 Grab-and-Go Emergency Kit
-
Include headlamps, tools, copies of documents, first-aid supplies, a multi-tool, fire-starting materials, emergency cash, and walkie-talkies.
-
For families: diapers, pet food, games, etc.
-
Keep a laminated list of critical items and where they are stored by your shelter door.
During the Storm: Drop, Cover, and Hold On
-
Do NOT go outside to look for the tornado. If you can see it, it's too late to run.
-
Go to your storm shelter immediately. No basement or safe room? Get in a small interior room on the lowest floor, away from windows.
-
Cover yourself with a mattress, heavy blankets, or even a metal trash can for debris protection.
-
Bring in pets and livestock if it's safe—otherwise, shelter them ahead of time.
-
Keep a battery-powered radio with you to monitor updates.
After the Storm: Dig Out and Assess Carefully
-
Watch for downed power lines, ruptured propane tanks, and structural damage before moving around.
-
Check for injured animals or trapped livestock—have tools ready to cut fencing or remove debris.
-
Don’t drink contaminated rainwater runoff or exposed well water until tested.
-
Photograph and document all damage for off-grid insurance claims or FEMA aid, if applicable.
-
Re-secure the property as soon as possible: repair fencing, lock up stores, board up windows.
Pro Tips for Tornado-Prone Homesteads
-
Build earth-bermed structures whenever possible—they resist wind pressure better.
-
Keep multiple emergency kits: one in the home, one in the barn, one in your vehicle.
-
Store critical records and backups in waterproof/fireproof containers in your safe room.
-
Don’t underestimate microbursts—they strike fast, often without warning, and can crush even reinforced roofs.
Final Thought
Tornadoes may be fast, but you’re faster when you prepare. Having a clear plan, reinforced structures, and community backup gives you the edge to ride out even the fiercest storm. This isn’t just about surviving—it’s about staying rooted, rebuilding quickly, and keeping your land, your people, and your livestock safe.
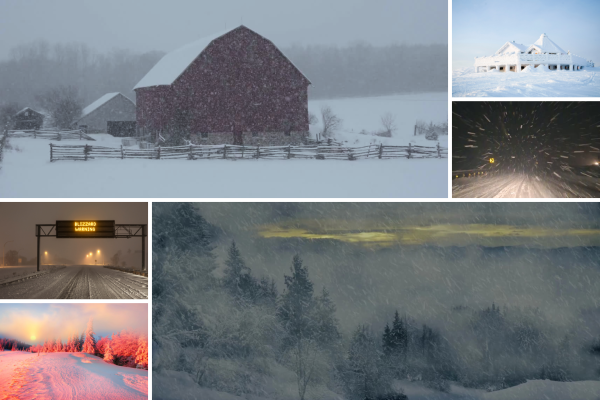
Winter Storms & Extreme Cold: Outsmarting the Deep Freeze
Living off-grid during a harsh winter isn’t just cozy fires and pretty snowdrifts—it can be bone-snapping cold, power-zapping storms, and weeklong lock-ins. But if you’re properly prepared, you won’t just survive it—you’ll own it. Let’s talk smart design, survival mindset, and what to do before, during, and after the freeze hits.
The Risks of Severe Cold
Extreme winter weather can bring more than a drop in temperature:
-
Power loss (especially in grid-tied areas)
-
Frozen pipes, water systems, and fuel lines
-
Impassable roads and isolation
-
Roof collapses from heavy snow
-
Frostbite, hypothermia, and other health risks
-
Dead or stressed livestock and frozen crops
Regions at risk include:
-
Northern and mountain states (Montana, Minnesota, Colorado)
-
High-elevation homesteads (Appalachians, Rockies, Sierra Nevada)
-
Anywhere with surprise cold snaps or Arctic fronts
Designing for the Cold
The best time to prepare for winter? Before it arrives.
1. Weatherproof Your Structures
-
Seal air leaks with weatherstripping, caulking, or heavy drapes.
-
Use thermal curtains, storm windows, or even bubble wrap insulation on single panes.
-
Check roof integrity and snow load capacity—consider adding a snow slide roof design or reinforcing supports.
-
Install wood stoves, rocket mass heaters, or propane backup heat in case of long outages.
2. Insulate Everything
-
Insulate pipes, animal waterers, and root cellars.
-
Wrap exposed plumbing with heat tape or pipe foam.
-
Insulate greenhouse bases or beds with straw bales, mulch, or row covers.
3. Thermal Battery Design
-
Use thermal mass (stone, water barrels, or thick adobe walls) to absorb and radiate heat slowly.
-
Position sun-facing windows to allow passive solar heating during daylight hours.
Critical Supplies Checklist
-
Backup heat (wood, propane, kerosene, or solar thermal)
-
Blankets, wool clothing, thermal sleeping bags
-
Emergency food, water, and cooking supplies
-
Flashlights, battery radios, power banks
-
Snow shovels, axes, and ice melt
-
First aid kits with frostbite and hypothermia supplies
Cold-Proofing Livestock and Animals
-
Provide wind-blocked shelters with deep bedding (straw or wood chips).
-
Install heated water bowls or passive insulation barrels to keep drinking water from freezing.
-
Ensure adequate calories in winter feed—animals need more energy to stay warm.
-
Use deep litter systems in chicken coops to generate warmth from composting bedding.
Before the Storm
-
Top off fuel tanks and firewood supplies.
-
Charge batteries, test solar setups, and secure backup power.
-
Wrap pipes and drain unnecessary outdoor water lines.
-
Harvest and store vulnerable crops like winter greens or root veg.
-
Make sure emergency communication tools are charged and reachable.
During the Storm
-
Stay inside and warm. Only go out for absolute essentials like checking animal shelters or retrieving firewood.
-
PRO TIP: Beware White-Out Conditions
In a heavy snowstorm or blizzard, visibility can drop to nearly zero in seconds. This is called a white-out, and it can disorient you even in familiar areas like your backyard or between the house and the barn. People have gotten lost and frozen to death just feet from their doors.-
Tie a rope from your door to your animal shelters or woodpile in advance if you're in a high-risk zone.
-
Never leave the shelter without a partner or without someone knowing your route and estimated time.
-
Keep a whistle on you—it can save your life if you get disoriented.
-
-
Keep heat centralized—block off unused rooms to conserve warmth.
-
If heat fails:
-
Layer up in insulated gear.
-
Use hot water bottles, pre-heated bricks, or thermal mass to share warmth.
-
Eat high-fat, high-calorie meals for energy.
-
-
For livestock:
-
Check water at least twice daily, using insulated or heated buckets if available.
-
Add fresh bedding to help retain warmth and reduce moisture buildup.
-
After the Freeze
-
Inspect plumbing and water systems for freeze cracks.
-
Clear snow off roofs and solar panels to prevent damage and restore power generation.
-
Check animal housing for wind or moisture damage.
-
Assess your performance—what worked, what failed, what to fix before next time.
Frost-Smart Tips
-
Keep candles and mason jars of water on sunny sills to add a little passive heat and humidity.
-
Use thermal curtains or space blankets at night.
-
Paint rain barrels black and place them inside a cold-frame-like box to create solar-heated thermal batteries.
- A can of Crisco and a wick will burn for a very long time, giving off both heat and light
Winter is not the enemy—it's the test. With smart prep, off-grid heating backups, and a sharp understanding of cold’s mechanics, you’ll glide through the season with your pipes unburst, your animals warm, and your sanity intact.
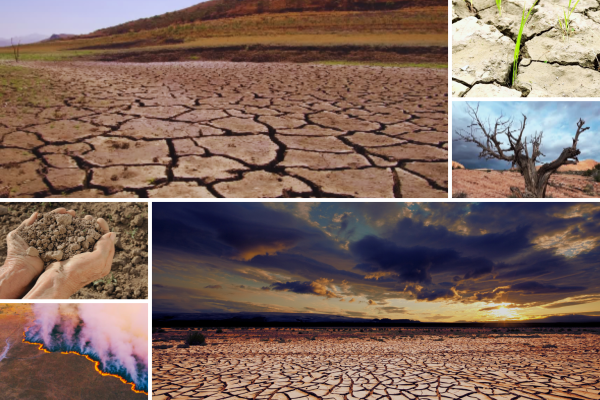
Droughts and Water Shortages: Thriving When the World Dries Up
Water is life—plain and simple. Without it, crops fail, livestock suffer, and hygiene becomes a challenge. Droughts don’t just affect farms in arid regions anymore. With rising climate unpredictability, even traditionally rainy areas are seeing extended dry spells.
This section helps you prepare for, survive, and adapt to drought conditions without sacrificing your crops, animals, or sanity.
Understanding the Risk
A drought isn’t just “no rain.” It’s prolonged periods of below-average moisture that deplete groundwater, dry out soil, and limit surface water supplies. Droughts can sneak in slowly but hit hard when your well runs dry, rain barrels stay empty, and plants start to wither.
Droughts are made worse by:
-
Shallow wells or seasonal creeks
-
Inefficient irrigation
-
Monoculture planting
-
No water catchment or redundancy
-
Poor soil water retention
Before the Drought: Build Water Resilience
💧 Capture Every Drop
-
Install rainwater catchment systems on every roof—house, barn, shed.
-
Use first-flush diverters to keep out debris.
-
Collect water in multiple tanks: above-ground for gravity-fed, and buried for cool, long-term storage.
🌱 Mulch Like Your Life Depends On It
-
A thick mulch layer (straw, wood chips, living cover crops) helps the soil retain moisture, reduce evaporation, and improve structure.
🚿 Water-Smart Infrastructure
-
Switch to drip irrigation and soaker hoses instead of sprinklers.
-
Use timers, flow restrictors, and soil moisture sensors to minimize waste.
-
Reuse greywater from washing machines or showers for non-edible plant irrigation.
🔁 Diversify Your Water Sources
-
Dig a second well or establish access to a nearby spring, stream, or neighbor’s supply if possible.
-
Consider condensation harvesters in extreme zones—passive or active systems that pull moisture from air.
🐓 Plan Animal Water Use Wisely
-
Rotate livestock to pastures near water sources.
-
Store extra drinking water in food-safe containers for each species.
During the Drought: Conserve, Prioritize, Adapt
-
Prioritize drinking water for people and animals.
-
Group plants by water needs and let low-priority plants go dormant or die back.
-
Collect morning dew with tarps or netting if conditions allow.
-
Shut down non-essential systems like ornamental ponds or flushing toilets—switch to composting.
⛔ Avoid These Common Mistakes
-
Don’t overwater “just in case”—many plants do better with deep, infrequent watering.
-
Don’t water during peak sun—do it early morning or after sunset.
-
Don’t let leaky hoses or fittings cost you precious gallons.
Pro Tips for Homesteaders
-
Swales and earthworks slow runoff and direct water deep into the soil—great for long-term hydration.
-
Grow drought-tolerant crops: amaranth, cowpeas, okra, sweet potatoes, and hardy perennials.
-
If necessary, set up a community water-sharing network with nearby homesteaders or neighbors.
Final Thought
Drought doesn’t mean defeat—it means working smarter with what nature gives you. With some forethought, smart design, and a conservation mindset, you’ll outlast the dry season and come back stronger when the rains return.
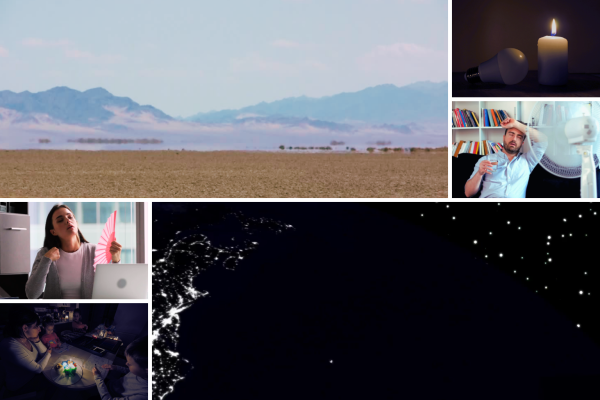
Heatwaves and Blackouts: Surviving the Burnout Without Burning Out
Heatwaves can be silent killers—especially when combined with grid-down conditions. And let’s be real, when power goes out during 100+ degree days, it’s not just about comfort. It’s about survival.
This section is all about staying cool, hydrated, and functional—even when your AC is fried, the fridge is down, and the sun won’t quit.
Why Heatwaves Are So Dangerous
High temperatures, especially over multiple days, can lead to:
-
Heat exhaustion or heatstroke
-
Crop failures
-
Water loss
-
Livestock deaths
-
Power grid failures (rolling blackouts or full grid-down)
When humidity’s high, the body can’t sweat properly to cool itself. When it’s dry, you can dehydrate faster than you realize. And when there’s no power? Things get risky, fast.
Before the Heat Hits: Prep Like a Desert Fox
🧱 Passive Cooling Infrastructure
-
Install shaded awnings, pergolas, or trellises over windows.
-
Use reflective materials or whitewash on roofs and exterior walls.
-
Build or retrofit earth-bermed root cellars or basement spaces for cool retreats.
🌬️ Airflow Matters
-
Set up natural cross-ventilation using screened windows or thermal chimneys.
-
Use solar-powered fans to move air when the grid is down.
-
Build a DIY swamp cooler if humidity is low.
🌿 Shade & Shelter
-
Plant fast-growing shade trees on the west and south sides of your house.
-
Train vines or install shading cloth over livestock pens and garden beds.
💧 Hydration Infrastructure
-
Stockpile water bottles or jugs just for hydration.
-
Add electrolyte powders or oral rehydration salts to your first aid stores.
-
Freeze jugs of water now—you can use them in coolers or to chill rooms as they thaw.
🏠 Design for Hot Climates
If you’re planning to live in an area that stays hot most of the year, build with heat in mind right from the start.
Use super-thick walls made from compressed straw bales sealed in cob, earthbag construction, or adobe. These materials offer natural insulation and thermal mass that keep interiors cool during the day and release warmth at night.
Orient your home for natural cross-ventilation, using window placement and roof overhangs to direct breezes through the structure.
Whenever possible, partially earth-bury your living spaces to stay below the peak heat zone—think root-cellar comfort with living-space functionality.
During the Heatwave: Don’t Overdo It
-
Stay inside between 10am and 4pm. That’s peak heat.
-
Drink water every hour, even if you’re not thirsty.
-
Wear loose, light-colored clothing.
-
Wet towels and drape them on your neck, wrists, and ankles to cool blood flow.
-
Keep livestock shaded and watered, with shallow troughs for foot cooling.
When the Power Goes Out: Keep Your Cool Without a Grid
-
Close blinds, curtains, or use reflective foil during the day to block solar heat.
-
Open windows only when temps drop below indoor levels—usually at night.
-
Use a solar-powered or battery fan with frozen water jugs to blow cool air.
-
Avoid cooking indoors—use solar ovens or cook outside to keep heat out of the house.
-
Move to your coolest room, cellar, or root storage space and stay there.
Final Thought
Heatwaves don’t care how tough you are—they test your systems, your design, and your discipline. But with smart planning and resourcefulness, you can stay cool, stay hydrated, and stay in control—even in the hottest days off-grid.
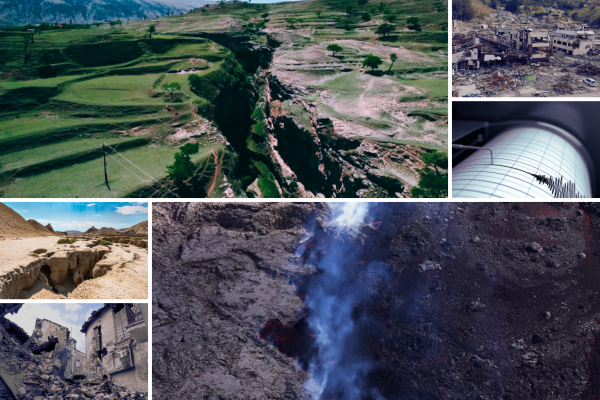
Earthquakes & Geological Events: Standing Strong on Shaky Ground
When the ground starts moving, it doesn't care how off-grid or sustainable you are. Earthquakes, landslides, sinkholes, and subsidence can rip through your land, structures, and water systems in seconds. But with smart design, solid site choice, and simple structural reinforcements, you can keep your homestead standing tall—even when the earth doesn't.
What Counts as a Geological Disaster?
-
Earthquakes: Sudden shaking caused by movement in the Earth's crust.
-
Landslides: Slopes that give way and carry soil, rock, and debris downhill.
-
Sinkholes: Sudden collapse of the ground, usually due to underlying erosion.
-
Soil Subsidence: Gradual or sudden sinking of the ground—common in areas with poor soil structure or depleted aquifers.
These events can damage buildings, disrupt water and power systems, and cut off access to vital supplies or escape routes. In off-grid living, where you’re often your own first responder, being prepared isn’t optional—it’s survival strategy.
Know Before You Build: Risk Assessment Basics
Before you ever pound a post or dig a swale:
-
Check Geological Maps: Local or regional USGS maps can reveal nearby fault lines, historic slide areas, or karst (sinkhole-prone) regions.
-
Test Your Soil: Have your property soil-tested, especially before building. Unstable soils (like expansive clay or loose fill) can shift dramatically during a quake.
-
Ask About History: Neighbors, local geologists, and county records can reveal past disasters that don’t show on maps.
If you’re buying land, include this risk research in your decision-making—disaster-prone land may still be workable with the right preparations, but you need to know what you’re getting into.
Earthquake Preparedness for Homesteaders
1. Build Earthquake-Resilient Structures
-
Use flexible building materials: wood, straw bale, earthbags, and timber frame buildings often perform better than brick or unreinforced concrete.
-
Secure the foundation to the frame using seismic anchors or metal strapping.
-
Use shear walls or bracing systems in larger structures for extra stability.
-
Install earthquake-resistant shelving: bolt bookshelves and cabinetry to studs, and use lip edges to keep items from flying off.
2. Protect Your Essentials
-
Store fuel, water, and food supplies in low, secure locations that won’t tip or burst open.
-
Bolt battery banks and power inverters to walls or concrete pads.
-
Use quick-release gas line shutoffs if using propane or methane systems.
3. Emergency Planning
-
Designate safe zones indoors—away from windows, shelves, and hanging objects.
-
Prepare bug-out routes in case your primary access road gets blocked by debris or slides.
-
Create emergency supply kits: include masks for dust, crowbars for stuck doors, water, food, light, and basic first aid.
What About Landslides and Subsidence?
If your land is on or near a slope—or if it's been disturbed by grading, overgrazing, or road cuts—you’re at risk.
Slope Safety Strategies:
-
Avoid building or placing water tanks on steep slopes without proper engineering.
-
Use retaining walls, terracing, and deep-rooted plants to stabilize slopes.
-
Redirect water away from slopes—never let greywater or storm runoff flow over unstable areas.
Subsidence can happen slowly, but it’s just as dangerous:
-
Avoid draining underground aquifers too aggressively.
-
Watch for cracks in soil, tilting fence posts, or sinking outbuildings—early signs something’s shifting.
-
Build structures on spread footings or raft foundations if soil is questionable.
What to Do During an Earthquake
-
Drop, Cover, and Hold: If indoors, get low under a sturdy table and cover your head. Stay away from windows.
-
If Outside: Move away from trees, power lines, or rock faces.
-
If in a Vehicle: Stop safely and stay inside until shaking stops.
-
Avoid running—falling debris causes more injuries than the quake itself.
After the Shaking Stops
-
Check for structural damage—don’t enter cracked buildings until confirmed safe.
-
Shut off gas or propane lines if you smell anything strange or hear hissing.
-
Check water tanks, power systems, and animal pens—look for leaks, damage, or breaches.
-
Be ready for aftershocks, which can be just as dangerous.
Thriving on a Tectonic Timeline
Being off-grid doesn’t mean being unprepared—it means being independently ready. With the right structures, thoughtful design, and a cool head, your homestead can weather a geological shake-up without becoming rubble.
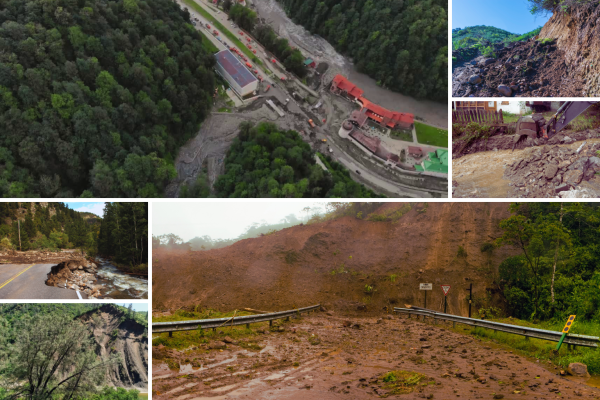
Landslides & Mudslides: Staying Safe on Shaky Ground
When most people think about dangerous disasters, landslides don’t usually make the top of the list—but they should. In hilly, mountainous, or recently burned areas, these earth movements can strike with little or no warning and cause total destruction in seconds. And it’s not just hillsides in California or the Rockies—we’re talking anywhere with unstable soil, slopes, or poor drainage.
If your homestead is built on—or below—a slope, this is one hazard you can't afford to ignore.
Understanding the Risk
Landslides (rock, soil, or debris sliding downhill) and mudslides (fast-moving floods of mud and water) are usually triggered by:
-
Heavy rain or snowmelt saturating the ground
-
Earthquakes shaking loose unstable terrain
-
Wildfires stripping vegetation that held soil in place
-
Improper grading or deforestation
-
Poor drainage and erosion over time
These slides don’t need to be huge to be dangerous—even a small slide can destroy outbuildings, bury roads, or take out power systems. In rural or off-grid homesteads, they can also isolate you from help or cut off your water source if springs or catchment systems get buried or blocked.
Before the Slide: Prevention and Preparation
-
Know your slope.
-
Walk your land and look for signs of unstable terrain: tilted trees, cracked soil, drainage ruts, or “stair-step” fractures in hillsides.
-
Check historical landslide maps (many counties provide these through their GIS departments).
-
Talk to neighbors—long-time locals often know where slides have happened before.
-
-
Plant deep-rooted, perennial vegetation.
-
Roots hold the soil in place. Native grasses, trees, and shrubs are your first defense.
-
After a wildfire or heavy clearing, replant ASAP and use erosion control mats or straw wattles on bare slopes.
-
-
Build with water in mind.
-
Make sure runoff is channeled away from slopes and structures.
-
Use French drains, swales, or diversion ditches to direct water around buildings and driveways.
-
Avoid building at the base of a steep slope or in a historical slide path.
-
-
Avoid destabilizing your land.
-
Never dig out or undercut a hillside unless you're working with a structural engineer.
-
Don’t add heavy loads (like sheds, tanks, or vehicles) on the edge of a slope.
-
When the Ground Starts to Move: What to Watch For
-
Early warning signs:
-
Cracks appearing suddenly in walls or the ground
-
Leaning fences, poles, or trees
-
Doors or windows that suddenly stick
-
Sudden changes in spring or groundwater clarity
-
-
During heavy rains, listen.
-
Landslides often make a low rumbling noise like thunder or a freight train before they arrive.
-
If you hear cracking, popping, or roaring—don’t investigate. Grab your go-bag and move uphill immediately.
-
-
Have an uphill bug-out route.
-
Landslides follow gravity. Your escape plan should always include a route to higher, stable ground.
-
After the Slide: Recovery and Resilience
-
Don’t re-enter slide zones until cleared.
-
The soil may still be moving. Secondary slides can happen hours or days later.
-
Watch for ruptured gas lines or hidden electrical hazards under the soil.
-
-
Test your water supply.
-
Wells, springs, or cisterns can be contaminated or clogged after a slide.
-
If water is muddy or cloudy after a slide, don’t use it until tested or filtered properly.
-
-
Rebuild with better drainage.
-
If a slide has occurred once, it can happen again. When rebuilding, reinforce with proper grading, terracing, and vegetation.
-
-
Report the damage.
-
Even if you’re off-grid, notifying local geological or emergency management agencies helps build better regional risk maps for everyone.
-
Bonus Tip: Mudslide Aftermath and Food Security
If your garden or orchard is wiped out by mud or rocks, soil remediation is key. Test for contaminants, cover exposed areas with compost and straw, and plant cover crops to restore structure. Don’t try to grow edibles right away unless you know the soil is safe.
Final Thought: Gravity Never Sleeps
Landslides can seem like silent assassins—there’s no warning siren, no flashy Doppler radar graphic. But when you're paying attention to your land and its signals, you can prepare. And if the earth does move? You’ll know exactly what to do, where to go, and how to rebuild with confidence.
Volcanic Activity: Surviving the Fury of the Earth’s Core
Volcanoes may seem like dramatic backdrops for movies or far-off tropical islands, but for millions of people worldwide—including homesteaders in the Pacific Northwest, Alaska, Hawaii, and certain inland volcanic fields—they are a very real threat. Even if you're not living directly on a volcanic slope, ashfall, lahars, toxic gases, and seismic activity can reach hundreds of miles from the eruption site and turn a peaceful homestead into a hazard zone.
This section will guide you through how to assess volcanic risks, prepare your homestead, and stay safe if the earth decides it’s time to vent.

Understanding the Risk
Volcanoes don’t always erupt with lava-spewing fury. Some explode suddenly (like Mount St. Helens), others ooze lava slowly (like Mauna Loa), and some stay dormant for centuries before waking up angry. The risks depend heavily on the type of volcano, your distance from it, and the prevailing wind and water patterns.
Even if you’re 100+ miles away from an active volcano, ashfall can:
-
Collapse roofs
-
Destroy crops and soil structure
-
Kill livestock by contaminating forage and water
-
Cause lung and eye issues in humans and animals
-
Damage engines, electronics, and solar panels
That makes volcano preparedness essential even for off-grid homesteads far from the lava zone.
Before the Eruption: Preparing for Volcanic Threats
-
Know your proximity to active and dormant volcanoes.
-
Use the USGS Volcano Hazards Program to identify threats near you.
-
Research the history of nearby volcanic activity and ashfall zones.
-
-
Prep for ashfall like you’d prep for a snowstorm—except it’s toxic.
-
Install heavy-duty roof supports to prevent ash buildup from collapsing buildings.
-
Stock up on N95 or P100 respirators, goggles, and plastic sheeting to seal windows and vents.
-
Keep extra filters for air systems, water catchment, and vehicle engines.
-
-
Have a livestock plan.
-
Create covered or sealable shelters for animals.
-
Store extra feed and clean water—ashfall can ruin grazing areas and contaminate all surface water.
-
-
Protect infrastructure.
-
Cover solar panels or shut them down if ash starts falling—it’s like sandpaper on your tech.
-
Disconnect sensitive electronics if seismic activity increases or ash clouds are inbound.
-
When It Erupts: What to Do During Volcanic Activity
-
Shelter in place unless you’re in a lava flow or lahar (mudslide) path.
-
Lava flows tend to move slowly—you’ll have time to evacuate if you’re at risk.
-
Lahars, however, can move fast. Know if your property is in a drainage basin that could carry them.
-
-
Close all vents and seal up your shelter.
-
Ash gets everywhere. Use plastic sheeting, painter’s tape, and damp towels to block airflow from windows, doors, chimneys, and attic vents.
-
If you must go outside, wear a mask, goggles, long sleeves, and a hat.
-
-
Monitor local emergency broadcasts (radio, NOAA weather stations, or mesh networks) for updates.
-
Ashfall zones shift with wind direction, and secondary eruptions or earthquakes may follow.
-
After the Ash Settles: Recovery and Resilience
-
Ash cleanup is serious work.
-
Shovel ash from roofs carefully—it’s heavy. A few inches can weigh hundreds of pounds.
-
Avoid using leaf blowers or dry brooms. Wet the ash slightly to reduce dust but not enough to create sludge.
-
-
Check and clean air filters, solar panels, engines, and water catchment.
-
Don’t drink or use water until you’ve tested and filtered it.
-
-
Evaluate soil damage and recovery.
-
Volcanic ash can eventually enrich soil—but short term it can create crusty, unworkable surfaces. Sheet mulching and cover crops can help restore texture and fertility.
-
-
Long-term air quality management.
-
Use HEPA air filters indoors and ventilate carefully when outside air clears.
-
Pro Tip: Plan for Off-Grid Evacuation Routes
Lava and lahars can block roads. If you’re near a high-risk area, have a bug-out route that avoids valleys and riverbeds, and store printed maps in your emergency go-bag. If you live near the coast, remember that tsunamis and eruptions can go hand-in-hand.
Final Thought: Volcanic Preparedness Isn’t Just About Lava
Most homesteaders are more at risk from ashfall, water contamination, and roof collapse than from lava itself. But just like with every disaster we’ve covered—knowledge, preparation, and adaptability are your best tools. The land may be powerful, but so are you.
Sinkholes & Land Subsidence: When the Ground Gives Way Beneath You
It’s the stuff of nightmares—one minute your yard, pasture, or barn is solid ground, and the next it’s a gaping hole. Sinkholes and land subsidence are slow-motion disasters that don’t get as much attention as earthquakes or floods, but they can be just as devastating—especially if your homestead is built in the wrong place or over the wrong kind of geology.
Whether it’s a sudden collapse or a slow sagging over years, when the land itself begins to shift, your foundations, water systems, and livestock safety are all at risk.

What Are Sinkholes and Subsidence?
-
Sinkholes are sudden collapses in the ground caused when soil or rock below the surface can no longer support the weight above it. They often occur in areas with karst geology, where limestone or gypsum gets dissolved by groundwater over time, leaving behind underground voids.
-
Subsidence is gradual sinking or settling of the ground, often caused by extraction of groundwater, mining, oil/gas removal, or poor construction. It can cause long-term infrastructure damage and permanent changes to land shape and drainage.
Where These Threats Lurk
Sinkholes are most common in areas with karst terrain, especially:
-
Central Florida
-
Eastern Texas
-
Kentucky and Tennessee
-
Pennsylvania
-
Missouri
-
Parts of the Ozarks and the Appalachian foothills
Subsidence can occur anywhere, but it’s especially common:
-
In areas with intensive groundwater pumping
-
Over old mine shafts or oil fields
-
In regions with peaty, compressible soils
Even areas without known karst systems can experience manmade sinkholes from busted sewer lines, leaky irrigation systems, or poorly compacted backfill after construction.
Prevention and Preparedness: What You Can Do
-
Research before you buy land.
-
Ask your local geological survey office if sinkholes or subsidence have been reported in the area.
-
Review soil maps, topographic maps, and if possible, order a geotechnical survey before you build on suspect ground.
-
-
Inspect your property regularly.
-
Watch for signs like:
-
Sudden dips or soft spots in the yard
-
Cracks in the foundation or driveway
-
Slumping fences or tilting outbuildings
-
Doors and windows sticking unexpectedly
-
-
These could all be signs of underground shifting.
-
-
Mind your water.
-
Leaky pipes, bad drainage, and excess surface water can speed up sinkhole formation.
-
Maintain irrigation systems and direct runoff away from your structures.
-
-
Use structural reinforcement wisely.
-
Building on piers or using floating foundations may help in subsidence-prone areas.
-
Don’t just fill in a depression with loose dirt—that can make it worse. Have suspect areas evaluated by a professional.
-
If a Sinkhole Opens Up: What to Do
-
Stay back.
-
A visible hole may only be the beginning. The edges are unstable and can collapse further.
-
Keep people, animals, and vehicles away.
-
-
Evacuate if it's near a structure.
-
Even if damage isn’t visible, shifting underground can destabilize a building’s foundation. Move out until it's inspected.
-
-
Contact the proper authorities.
-
In many states, geological or emergency management offices will investigate sinkholes and may even offer financial or technical assistance.
-
-
Document everything.
-
Take photos, measure the hole if safe, and keep track of any signs leading up to it. This info can be helpful for insurance or support programs.
-
Final Thought: It’s Not Just About Holes—It’s About Awareness
Sinkholes and land subsidence remind us that what lies beneath is just as important as what we build above. But with careful site selection, ongoing awareness, and smart construction, you can avoid being caught off guard by the slow sag—or sudden drop—of unstable land.
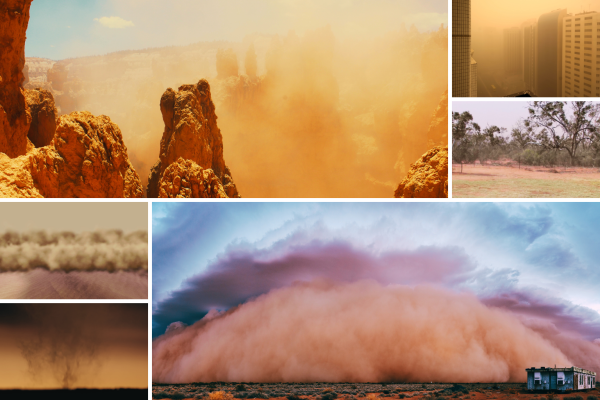
Dust Storms & Haboobs: Battling the Breath-Stealing Blasts of the Desert
Dust storms—also known as haboobs in arid regions—aren’t just dramatic walls of dust rolling across the horizon. They’re dangerous, fast-moving hazards that can blind you, choke your animals, infiltrate your home systems, and grind your gear into dust.
In dry, windy, and drought-prone areas, these storms can hit with little warning, making visibility drop to near-zero in seconds and coating everything in fine particulate matter. That dust doesn’t just make a mess—it carries fungi, pollutants, and pathogens, and it can wreck your lungs, your electronics, and your soil if you’re not prepared.
Where and Why Dust Storms Happen
Dust storms typically occur in semi-arid and arid regions, especially:
-
The American Southwest (Arizona, New Mexico, parts of Texas and Nevada)
-
The High Plains during prolonged droughts
-
Anywhere with disturbed or bare soil, high winds, and dry conditions
They often form from the gust front of thunderstorms, where winds rush ahead of the rain and pick up loose dirt, creating a moving wall of dust up to 100 miles wide and thousands of feet tall.
Prepping Your Homestead for Dust Storms
-
Vegetative Ground Cover is Gold
-
Keep your soil covered. Living roots, mulch, or ground cover crops anchor the soil and stop erosion.
-
Bare dirt = airborne dirt. Even in off-season, plant cover crops or leave crop residues in place.
-
-
Windbreaks Help Slow the Blow
-
Plant dense rows of native shrubs or trees along the windward side of your homestead. Layered hedgerows or constructed wind barriers can significantly reduce ground wind speed.
-
-
Dust-Proof the Homestead
-
Seal windows, doors, and vents—use weather stripping, door sweeps, and mesh filters.
-
If possible, install HEPA filters on any air intakes and consider an indoor air purifier.
-
Store critical equipment (engines, electronics, tools) in sealed, dust-resistant containers or sheds.
-
-
Protect Livestock and Poultry
-
Make sure animals have access to covered, sheltered areas with protection from blowing dust.
-
Provide clean water and consider covering troughs or using nipple systems to keep dust out of drinking water.
-
Monitor for respiratory issues post-storm—coughing, nasal discharge, or lethargy are red flags.
-
-
Prepare Yourself and Family
-
Stock N95 masks or better for every family member.
-
Keep goggles and protective clothing handy if you have to move around outdoors.
-
Avoid driving during a dust storm—visibility can drop to zero within seconds, causing pileups.
-
When the Dust Starts to Rise
-
Go inside, fast.
-
Close all windows, doors, vents, and hatches. Tape or seal gaps if needed.
-
-
Shut down sensitive systems.
-
Turn off fans or anything that pulls outside air in. Cover or seal electronics and tools.
-
-
Keep calm and air clean.
-
Run a HEPA air purifier or HVAC system if it has a quality filter.
-
Use wet cloths or damp towels under doors to block incoming dust.
-
-
Wait it out.
-
Most dust storms pass in under an hour, though some linger. Don’t go out until the air visibly clears and it’s safe.
-
After the Dust Settles
-
Clean strategically. Start with filters, vents, electronics, and solar panels. Use vacuums with HEPA filters to avoid re-contaminating the air.
-
Check air quality reports. Stay indoors if particulates remain high for days after.
-
Inspect soil health. Dust storms can rob your soil of its finest, most nutrient-rich particles. Consider re-applying compost, mulch, or biochar to stabilize it.
Final Thought: Anchor Your Soil, Shield Your Lungs, Protect Your Land
Dust storms may seem like a desert-only danger, but with rising drought conditions across much of the country, they’re creeping into more regions every year. Fortunately, the best defenses—soil cover, strong shelter, clean air—are already part of a good permaculture system. You don’t have to fight the dust if you’ve prepared your land to hold on to it.
Industrial or Nuclear Accidents: Staying Safe When the Invisible Threat Strikes
What Are Industrial or Nuclear Accidents?
Industrial accidents involve the release of hazardous chemicals, radiation, or pollutants due to equipment failure, poor maintenance, natural disaster, or human error. This can include:
-
Oil and gas leaks
-
Factory fires or explosions
-
Chemical spills (ammonia, chlorine, etc.)
-
Toxic smoke or vapor releases
-
Radiation leaks from nuclear power plants or waste sites
These types of events don’t always come with dramatic flames or obvious danger. Sometimes, the threat is invisible—airborne gases, contaminated water, or radioactive particles carried silently on the wind.
Risk Awareness: Know What’s Around You
Before buying land or settling permanently, do your research:
-
Check industrial and EPA maps for nearby facilities like chemical plants, pipelines, fracking sites, rail lines carrying toxic materials, or nuclear installations.
-
Use tools like the EPA’s Toxic Release Inventory (TRI) or Nuclear Regulatory Commission (NRC) maps to learn what’s operating in your county or watershed.
-
Look up local emergency response plans. If there’s no clear plan, that’s a red flag.
Before It Happens: Build Smart, Stock Smart
🧭 Distance is Your Friend
-
Don’t settle within 10–50 miles of a nuclear power plant if you want to minimize risk.
-
Avoid buying land downwind or downhill from chemical storage facilities, mines, or major highways/railways carrying hazmat.
🏠 Shelter in Place Readiness
-
Equip your home with high-efficiency particulate air (HEPA) filters or DIY sealed air-cleaning setups.
-
Keep plastic sheeting and duct tape on hand to seal windows and doors quickly.
-
Store N95 or P100 masks for chemical or smoke exposure.
-
Have iodine tablets (potassium iodide) if you’re anywhere near nuclear zones—this helps protect your thyroid from radioactive iodine.
🛢️ Water & Food Security
-
Store clean water in sealed containers inside your home to avoid contamination from outdoor sources.
-
Learn how to test well water and filter for industrial pollutants like heavy metals and VOCs.
-
Keep an emergency stash of non-perishable, sealed food in airtight containers.
During the Event: Don’t Hesitate—Activate
🏃♀️ Evacuate if Told—Fast
-
Don’t wait for a second notice. These disasters escalate fast.
-
Keep a go-bag with documents, water, mask, radio, and meds ready at all times if you’re near industrial or nuclear zones.
🏡 If You Must Shelter In Place
-
Seal windows, vents, and doors with plastic sheeting and tape.
-
Shut off HVAC systems to avoid pulling in contaminated air.
-
Stay tuned to emergency broadcasts (battery or hand-crank radios are vital).
-
Avoid using water from outdoor sources unless you know it’s safe—assume contamination.
After the Event: Long-Term Survival
🧼 Decontaminate Before Reentering Living Areas
-
Remove exposed clothes and seal them in a plastic bag.
-
Wash skin and hair thoroughly with non-contaminated water.
-
Don’t track fallout indoors—set up a transition zone between “clean” and “exposed” areas.
📦 Test & Monitor Your Environment
-
Test soil, water, and food before consumption.
-
Use Geiger counters or dosimeters near nuclear zones.
-
Be cautious of gardening in exposed soil—use raised beds with clean soil and mulch barriers.
🫱 Stay Connected
-
Join local preparedness groups or CERT programs.
-
Get HAM radio certified if you're in a remote area—it may be the only communication tool after major grid disruptions or evacuations.
Eco-Warrior Wisdom: Prepared ≠ Paranoid
Industrial and nuclear disasters are rare—but the consequences can last decades or more. By being aware, informed, and equipped, you can make calm, confident decisions when it matters most. Your homestead’s health, your family’s safety, and your community’s resilience all start with knowing what’s possible—and having a plan to meet it.
Pandemics & Medical Emergencies: Health is Wealth When You’re Off the Grid
What We’re Talking About
Pandemics and medical emergencies can take many forms:
-
Viral outbreaks like COVID-19 or influenza
-
Bacterial threats like MRSA or cholera
-
Foodborne illness or water contamination
-
Severe allergic reactions, burns, deep cuts, or broken bones
-
Chronic illness flare-ups (asthma, diabetes, heart conditions)
-
Lack of access to urgent care due to isolation, overwhelmed hospitals, or grid-down events
The key takeaway? Even the strongest homesteader isn’t immune to injury or illness. And in a crisis, access to care might vanish—so the care you’ve trained for and stocked up on may be all you’ve got.

Before It Happens: Build Health Resilience Early
🏥 Build a Homestead First Aid Station
-
Stock everything you’d need for trauma, wounds, burns, sprains, infections, and common ailments.
-
Include a suture kit, tourniquets, wound dressings, antiseptics, activated charcoal, antihistamines, and electrolyte packs.
📚 Train for Emergencies
-
Take CPR, trauma response, and wilderness first aid classes.
-
Learn how to identify and treat infections, set splints, handle dehydration, and administer epi-pens.
-
Consider joining CERT (Community Emergency Response Teams) or taking a Remote EMT course if you're remote and serious.
🧴 Boost Immunity and Preventative Care
-
Grow or store vitamin-rich herbs like elderberry, echinacea, garlic, ginger, and oregano.
-
Keep a strong immune system through nutrition, sleep, and stress reduction.
-
Make handwashing and clean food-handling habits second nature on your homestead.
📦 Prepare for Extended Isolation
-
Stock at least 30–90 days of essential medications, vitamins, painkillers, and hygiene supplies.
-
Store protective gear like N95 masks, gloves, goggles, and Tyvek suits if you’re in an outbreak-prone region.
🧪 Sanitation = Survival
-
Have a plan for off-grid sanitation: composting toilets, graywater treatment, separate zones for clean and contaminated items.
-
Always keep potable water separate from livestock or garden wash water.
During a Pandemic or Outbreak
🚪 Lock It Down Early
-
Limit visitors to your homestead.
-
Set up “quarantine space” if someone in your group is exposed or symptomatic.
-
Disinfect high-touch surfaces regularly (even off-grid doesn’t mean germ-free).
👥 Social Distance, Homesteader-Style
-
Homesteads already have built-in isolation advantages—but if you need to trade, barter, or visit a market, wear PPE and stay aware of public risk.
🧑⚕️ Treat at Home When You Can
-
Use your supplies and skills for basic and moderate issues.
-
Keep detailed medical logs of symptoms, temps, meds given, and responses.
📻 Stay Informed
-
Use battery or solar radios to follow public health updates.
-
If the grid’s down, coordinate with nearby homesteads or communities to share info and mutual aid.
Medical Emergencies Without Help on the Way
If no ambulance is coming and no ER is available:
-
Have a buddy system on the homestead so no one works alone.
-
Use a satellite communicator or HAM radio to call for help if possible.
-
Know triage basics—what can wait and what can’t (e.g. uncontrolled bleeding, unconsciousness, chest pain, anaphylaxis need urgent attention).
-
If you’re solo, train for self-aid techniques like applying tourniquets one-handed or treating shock.
After the Event: Long Recovery? You’re Ready
-
Keep moral support high—long illnesses and recovery can take a toll mentally, especially in small groups.
-
Rebuild herbal stocks and replace medical supplies as soon as you can.
-
Document everything—what worked, what you ran out of, what you never used—so you’re stronger next time.
Eco-Warrior Wisdom: You’re the Medic Now
You don’t need a white coat and a stethoscope to be someone’s lifeline. In a world where systems may fail, the most powerful thing you can offer is a calm head, steady hands, and a well-prepped first aid shelf. Homesteading isn’t just about growing food—it’s about growing capacity. And that includes health.
Civil Unrest & Social Disruption: Stay Calm, Stay Smart, Stay Standing
What We’re Talking About
Civil unrest happens when society itself becomes unstable—protests turn into riots, services are interrupted, and the normal rhythms of commerce, safety, and law enforcement start to break down.
Social disruption doesn’t always look like mobs and flames—it can be a slow crumble:
-
Political upheaval and curfews
-
Bank freezes or economic collapse
-
Mass layoffs, strikes, or trucker shortages
-
Shutdowns of critical supply chains
-
Loss of policing or emergency services
-
Polarization and violence in urban or rural areas
When the grid is stressed or the system cracks, the people on the fringes may be more isolated—but not necessarily insulated. Being prepared for instability is part of what makes homesteading powerful.

Before It Happens: Low Profile, High Awareness
🧠 Mindset: Stay Informed, Not Inflamed
-
Monitor local news, community networks, and national events.
-
Stay aware of polarization, propaganda, or economic warning signs, but avoid doom-scrolling.
-
Know the mood of your region—are things simmering under the surface?
🚪 Physical Security First
-
Reinforce doors, windows, and gates—especially if your property is semi-public.
-
Install cameras, motion detectors, or noisemakers (solar-powered models are great).
-
Build natural barriers: thorny hedgerows, fencing, livestock zones that slow intruders.
👀 Be the Gray Man (or Woman)
-
Avoid drawing attention. Don’t broadcast what you’ve stored, what you own, or where your retreat is.
-
Skip bumper stickers or social media that make you a target.
-
Practice OPSEC: operational security. Need-to-know only.
💬 Community Connections Matter
-
Build trust with neighbors. Strong local ties are your best defense.
-
Develop mutual aid agreements with nearby homesteads: “We check on each other, we help each other.”
🛠️ Supply & Self-Reliance
-
Keep at least 3–6 months of food, water, meds, and fuel.
-
Have cash on hand, small denominations. Banks might freeze.
-
Train now in barter and off-grid communication (HAM radio, encrypted messaging, signal flares if needed).
During a Breakdown or Unrest Event
🚧 Bug In, Not Out
-
Unless you're under direct threat, staying put is often safer than trying to “bug out.”
-
Secure your perimeter, limit movement, and follow your pre-set plans.
-
Use blackout curtains or shut off exterior lights at night—don’t advertise occupancy or activity.
🛑 Disengage and De-Escalate
-
Avoid confrontation. Don’t engage protestors, looters, or strangers near your property.
-
If someone confronts you, de-escalate with calm, not conflict. Avoid giving them a reason to stay.
🚰 Preserve Essentials
-
Ration fuel, food, and medicine until you know how long the disruption will last.
-
Rotate guard duties if living in a group, or set passive alert systems (dogs, bells, tripwire alarms).
📻 Information = Power
-
Stay tuned via solar radios, walkie-talkies, or digital messengers.
-
Coordinate with your mutual aid group—never operate in isolation if you don’t have to.
After the Smoke Clears
📓 Assess and Rebuild
-
Take stock of damages, losses, and what you did right or wrong.
-
Restock and reinforce—before the next wave.
-
Reach out to community partners to reconnect and rebuild.
🧠 Talk About It
-
Stress after unrest is real. If you’ve been through a tense time, give yourself and your household a chance to decompress.
-
Reflect and learn—what did you need that you didn’t have? What went better than expected?
Eco-Warrior Insight: Security Is a Community Project
Security isn’t about bunkers and bravado. It’s about clarity, calm, and capability. The more you can disengage from systems of chaos, the more freedom you gain to live intentionally. A well-prepped homestead isn’t just a retreat from the world—it’s a buffer zone of sanity, sovereignty, and service.
EMP & Grid-Down Events: When the Lights Go Out—Stay Powered, Stay Prepared
What We’re Talking About
An EMP (Electromagnetic Pulse) is a burst of electromagnetic energy—natural or manmade—that can disrupt or destroy electrical systems. While rare, the threat is real and potentially devastating. Add in widespread grid failures from aging infrastructure, cyberattacks, extreme weather, or resource scarcity, and you’ve got one of the most unpredictable (yet impactful) scenarios a modern homesteader might face.
A grid-down event doesn’t just mean no lights. It can mean:
-
No internet, phone, or radio
-
No ATMs or bank access
-
No fuel pumps, refrigeration, or water pumps
-
Medical devices and communication tools failing
-
Food spoilage, chaos, and confusion
It’s the kind of disruption that tests whether you’re just surviving—or truly self-reliant.

Before the Blackout: Power Up Your Plans
🔌 Shield What Matters
-
Store critical electronics (radios, laptops, solar inverters, backups) in Faraday cages—metal containers or bags that block electromagnetic waves.
-
A simple Faraday box can be made from a metal trash can with a tight-fitting lid, lined with cardboard or foam to prevent contact between devices and the metal.
⚡ Decentralize Your Power Supply
-
Use solar power systems with manual disconnects and EMP-resistant components (like DC-only systems or surge protectors).
-
Invest in low-tech backups: hand pumps, gravity-fed water, manual grain mills, oil lamps.
📻 Communication Backups
-
Keep a battery-powered or hand-crank radio, HAM radio, or walkie-talkies on hand.
-
Learn basic radio etiquette and emergency broadcasting channels.
💡 Lighting & Charging Options
-
Stock solar lanterns, battery banks, and hand-crank flashlights.
-
Keep extra batteries and solar chargers for AA/AAA devices.
🚿 Water and Waste Planning
-
Store water manually in barrels or containers.
-
Use a gravity-fed water filter (like a Berkey) that requires no power.
-
Prep your bucket toilet or composting toilet system with extra sawdust and hygiene supplies.
🥫 Food Strategy
-
Preserve foods that don’t require refrigeration.
-
Learn to cook with fire, solar ovens, or rocket stoves.
-
Use dry storage and fermentation to extend shelf life without electricity.
During the Outage: Don’t Panic, Do Proceed
🧠 First: Confirm the Scope
-
Use your Faraday-protected radio to scan for official broadcasts.
-
If all electronics fail, especially cars or phones, it could be a high-altitude EMP. If only the grid is out, it may be a natural failure or cyberattack.
🚷 Conserve and Protect
-
Lock down usage of batteries, fuel, and water—no telling how long this will last.
-
If you have community nearby, check on others and trade resources.
-
Keep security protocols active—power outages increase crime of opportunity.
🛠️ Manual Mode: Engage
-
Switch to hand-powered tools, use solar cookers, and rotate stored food using FIFO (First In, First Out).
-
Use candles, oil lamps, or covered LED lanterns at night.
💬 Signal Systems
-
Use flag codes, mirrors, whistles, or other low-tech signaling for communication if needed.
-
Avoid high-tech dependence unless you’ve shielded your gear.
After the Dark: Adaptation Over Expectation
🌅 Recovery Could Be Long
-
In major EMP scenarios, infrastructure may take months—or years—to rebuild.
-
Be mentally and physically prepared for a long-haul lifestyle.
🧰 Resilience Through Simplicity
-
Continue building habits that don’t rely on modern infrastructure.
-
Every blackout is a practice run. What did you wish you had? Add it. What went better than expected? Refine it.
Eco-Warrior Insight: Your Systems Are Your Shield
True resilience means you can unplug from the grid—by choice or by necessity—and not miss a beat. Whether the outage lasts hours or ushers in a new way of life, your preparedness is your power. With solar, storage, and a little savvy, you won’t just sit in the dark—you’ll thrive in the calm while others scramble in the chaos.
Invasive Species & Ecological Collapse: When the Balance Breaks
Some disasters creep in slowly. They don’t roar like a wildfire or crash like a flood—they slither, sprout, spread, and slowly choke the life out of your ecosystem. Invasive species and ecological collapse are the silent saboteurs of self-sufficiency, and ignoring them can undo years of careful homestead design.
These threats aren’t just “someone else’s problem.” They affect soil fertility, native pollinators, livestock safety, water systems, forest health, and even your ability to grow food. And once they're established, they are brutally hard to remove.
What Is an Invasive Species?
An invasive species is any plant, animal, insect, or microbe that:
-
Is not native to the ecosystem it's in
-
Spreads aggressively beyond control
-
Disrupts local ecosystems or agricultural productivity
-
Often has no natural predators in its new environment
These invaders can outcompete native species, introduce new diseases, alter soil or water chemistry, and reduce biodiversity. Some cause billions in agricultural damage, others wipe out keystone species, and some even directly harm humans or livestock.

Common Off-Grid Threats by Region
-
South & Southeast: Kudzu, fire ants, Burmese pythons, cogongrass
-
Southwest & West: Buffelgrass, tamarisk (salt cedar), zebra mussels, Africanized bees
-
Midwest: Emerald ash borer, feral hogs, garlic mustard
-
Pacific Northwest: Scotch broom, European green crab, sudden oak death
-
Northeast: Spotted lanternfly, Japanese barberry, hemlock woolly adelgid
Even aquaponics and permaculture setups are not immune—introduced species like crayfish or snails can throw entire systems off balance.
Warning Signs of Ecological Trouble
-
Decline of beneficial insects (like native bees or ladybugs)
-
Explosive spread of one species of weed, vine, or grass
-
Disappearing native wildlife or sudden animal die-offs
-
Algae blooms or murky water in natural ponds or tanks
-
Fruit trees or crops underperforming with no clear disease present
-
Soil becoming compacted, crusted, or unusually barren
Often, these aren’t one-off problems. They’re symptoms of an ecosystem that’s sliding out of balance—sometimes due to human activity, other times due to a new invader upsetting the harmony.
How to Guard Your Homestead Against Collapse
-
Know what’s native—and what isn’t.
-
Learn your region’s native plants, beneficial insects, and ecosystem indicators.
-
Check with local extension offices or invasive species watchlists (like EDDMapS).
-
-
Avoid introducing problems.
-
Don’t plant “fast-growing” non-native grasses or shrubs just because they’re cheap.
-
Be cautious when buying compost, soil, or mulch—check for contaminants like weed seeds or pests.
-
Never release aquarium plants, animals, or even worms into the wild or your garden.
-
-
Use biological controls wisely.
-
Sometimes nature fights back. Introduce beneficial predators or insects only when advised by experts. Some “solutions” become problems themselves (hello, cane toads…).
-
-
Diversify your systems.
-
Monocultures are fragile. Mix plant types, integrate animal systems, and keep redundancy in mind.
-
Resilient ecosystems bounce back faster after shocks.
-
-
Stay vigilant and act early.
-
Remove invasive weeds the moment they appear.
-
Trap or fence out feral animals before they multiply.
-
Report sightings of dangerous pests to your local ag department or conservation office.
-
Final Thought: Steward the Land, and It Will Feed You Forever
True self-sufficiency doesn’t just mean growing food or generating power—it means tending to the living system your homestead is part of. When you protect your soil, your pollinators, your watershed, and your wildlife, you’re building a buffer against collapse.
When ecosystems go down, they take everything with them—but when they’re cared for, they lift us all up.
Climate Change, Zone Creep, and the New Normal
If you’ve felt like the weather doesn’t behave like it used to—you’re not imagining it. Climate change isn’t just about global temperature—it’s about weather instability, shifting seasons, unpredictable patterns, and creeping changes that catch unprepared homesteaders off guard.
These aren’t future problems—they’re now problems. Whether you're farming in Texas, Vermont, or the Pacific Northwest, your growing zone has likely shifted, and with it, the timing of frosts, the intensity of droughts, the frequency of storms, and even the insect and disease load you’ll face.
What Is Zone Creep?
“Zone creep” refers to the slow shift in USDA Hardiness Zones—the climate categories that tell us which plants can survive the winter in a given area. Over the last few decades, most of the U.S. has warmed by half a zone or more. That means:
-
Plants that once died in the cold are now surviving
-
Pests and diseases are creeping northward
-
Spring comes earlier (and frost sometimes comes back unexpectedly)
-
Heatwaves are lasting longer and hitting harder
You might be able to grow a fig tree in Missouri now—but it comes with new challenges in water use, pest control, and pollination timing.
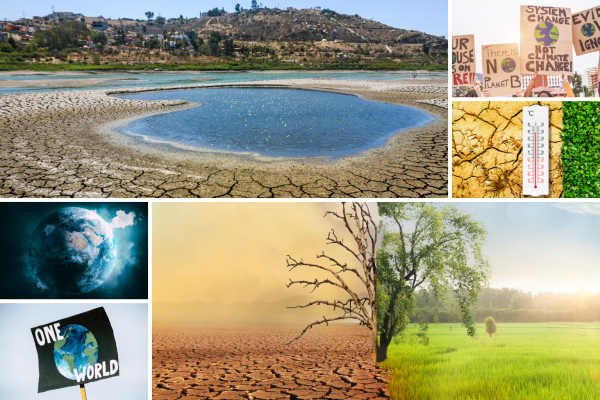
Impacts of a Warming, Wetter, Wilder World
Climate change doesn't show up as one single disaster—it shows up as a cascade of shifting baselines:
-
More intense droughts that dry out soil faster than ever
-
Higher snow loads in regions that used to see flurries
-
Longer growing seasons… and longer pest seasons to match
-
Unpredictable last frosts, ruining early spring crops
-
Flooding in new places, due to sudden rain dumps
-
Heatwaves that break power grids
-
Wildfire seasons starting earlier, burning longer
-
Crop and livestock stress from rising temps and shifting forage
Even places that once felt “safe” are feeling the pressure. And if you’re planning a homestead that’s built to last decades? These shifts have to be part of your planning, not an afterthought.
Ice Melt and Sea-Level Rise
If you're living near the coast—or even along tidal rivers—you’ve probably seen the headlines: glaciers and polar ice are melting at record speed. Sea levels are rising inch by inch, swallowing wetlands, creeping into basements, and making some areas permanently flood-prone.
This isn’t limited to the coasts. Glacial melt upstream changes entire river systems downstream, affecting:
-
Groundwater recharge
-
Flood cycles
-
Irrigation availability
-
Soil moisture and sediment delivery
And yes—in some areas, meltwater loss means less water in the long term, as alpine snowpack disappears and no longer feeds rivers into the dry season.
How to Adapt: The Climate-Smart Homestead
-
Use dynamic zone maps, not old ones. Go by current data, and understand your local microclimates.
-
Choose resilient, diverse crops and livestock that can handle a broader range of temperatures.
-
Design for water extremes—harvest rain, store runoff, and plan for both drought and flood.
-
Install shaded growing areas, windbreaks, and thermal mass to buffer sudden changes.
-
Use climate tracking tools and seasonal journals to monitor changes on your own land.
-
Avoid coastal investments that are vulnerable to sea-level rise unless they’re heavily hardened and short-term.
-
Engage in rewilding and permaculture strategies that build carbon back into your soil and restore water-holding capacity.
Final Thought: Plan for the Climate You’re Getting, Not the One You Grew Up In
Climate change isn’t coming—it’s already here. But you’re not powerless in the face of it. A prepared, informed, and flexible homesteader can build a system that thrives through the change—not just survives it.
It’s not about fear—it’s about foresight. And that’s exactly what makes a leader in any crisis.
Making Informed Decisions About Property and Risk
When it comes to off-grid living, where you build or buy your homestead can mean the difference between thriving or barely surviving. It’s not just about beautiful views, cheap acreage, or rich soil—though those things matter too. It’s about knowing the land and the risks that come with it. Wildfires, flooding, droughts, earthquakes, civil unrest… every location has its own set of hazards. Smart homesteaders don’t wait to get caught off guard—they plan ahead by making informed choices.
This section is about understanding how to evaluate a property for potential natural or man-made risks, how to do research on a region’s disaster profile, and how to plan accordingly. Because disaster preparedness doesn’t start with gear. It starts with location, design, and foresight.
Understanding the Landscape: Every Acre Tells a Story
Every property carries its own history, ecosystem, and set of vulnerabilities. Before you fall in love with a plot of land, you need to ask:
-
Has it flooded before?
-
Is it downwind from a chemical plant?
-
Are there signs of wild animal migration?
-
How close is the nearest fire department or hospital?
Get to know the land like it’s a new friend. Walk it. Observe it after a rain. Look for high ground and drainage channels. Watch how the wind moves and where the sun falls during different times of day. These things don’t just help with planning—they can save lives when disaster strikes.
How to Research Regional Risks Like a Pro
Let’s say you’ve found a dream property. Before you pack the truck, here’s how to research it like a seasoned eco-strategist:
-
Check FEMA Flood Maps
Go to msc.fema.gov and type in the address. This tells you whether you’re in a 100-year or 500-year floodplain—or safe from major flood risks. -
Review Historical Fire Activity
Use the National Interagency Fire Center or InciWeb to see recent fire history. If the area is dry, forested, or filled with brush, understand your ignition risk and plan firebreaks early. -
Search Earthquake Fault Data
The US Geological Survey Earthquake Hazards Program lets you zoom in on fault lines and seismic history. If it’s near a known fault, your building plans should include seismic reinforcement. -
Look Into Industrial Zones and Pollution Maps
The EPA’s EJScreen Tool shows environmental risk data—like proximity to waste sites, chemical storage, and air pollution hot spots. -
Ask About Past Disasters Locally
County records, long-time residents, and even old newspaper clippings can tell you about historical events like tornado touchdowns, chemical spills, or failed levees. -
Research Climate Trends
Use the NOAA Climate Toolkits to see how the region is trending—hotter summers, longer droughts, wetter winters—all of which affect your food systems, water supply, and storage plans.
Choosing Safer Land Without Sacrificing Function
Some hazards are unavoidable. But the goal isn’t to find the perfect land—it’s to find land you can plan around intelligently.
For example:
-
If flooding is a risk, buy higher elevation or design stilted buildings.
-
In wildfire zones, choose cleared zones near water and build with non-flammable materials.
-
In hurricane-prone areas, opt for land further inland with strong windbreaks and reinforced shelters.
It’s a matter of risk reduction, not risk elimination. Every homestead needs defense layers: location, design, infrastructure, and daily habits.
When Buying Land Remotely or Sight-Unseen
Many off-gridders buy land from a distance. If that’s you, go in eyes wide open:
-
Hire a local inspector or real estate agent familiar with the area’s challenges.
-
Use satellite tools like Google Earth or OnX Maps to see terrain, elevation, road access, and structures.
-
Look for zoning laws, easement issues, or water rights—especially in western states.
Never assume land is buildable or safe just because it’s for sale. Due diligence is your first act of self-defense.
Eco-Warrior Tip: Don’t Just Prepare—Design Around Risk
You’re not just building a home—you’re building a system. And every part of that system, from your garden to your solar panels to your composting toilet, should be designed with local hazards in mind.
In wildfire areas, use metal roofs, gravel walkways, and plant fire-resistant species like yarrow and rosemary. In drought zones, design rain catchment systems and greywater reuse loops. In tornado alley, build an earthbag root cellar that doubles as a storm shelter. Your design is your defense.
Building Your Personal Disaster Preparedness Plan
Knowing about disasters is important—but planning for them is where your power truly lies. You’re not here to be reactive. You’re here to be proactive, strategic, and unfazed when the world around you starts shaking, smoking, flooding, or freaking out.
This part of the lesson guides your students step by step through building a customized disaster preparedness plan, rooted in the real risks they face, with layered strategies to protect what matters most: their people, animals, food systems, and future.
1. Know Your Risks: Make a Personalized Hazard Profile
Start with what’s real for your location. Use what you learned in Part III to identify the top 3–5 most likely disasters based on where you live or plan to live. Write them down. This is your Hazard Profile.
Then, for each one, answer:
-
What has happened here before?
-
What could happen here next?
-
What are the consequences if it does?
This profile will guide the rest of your plan. You’re not just prepping for doomsday; you’re engineering resilience for the most probable events in your life.
2. Write a Clear Evacuation Plan
Even the most rugged homesteaders sometimes need to get out of dodge. And if you're going to evacuate, it must be done quickly, calmly, and intelligently. Build an evacuation plan that includes:
-
Primary and secondary routes out of your area
-
A list of supplies and documents to grab (you’ll build this in your go-bag)
-
A communication plan for checking in with family or community
-
Where you’ll go (e.g. relatives, bug-out property, or community center)
-
How you'll transport animals, tools, or gear (trailers, carriers, etc.)
-
A designated meeting point if your family gets separated
Write this plan out and print a copy. Put it on the fridge. If you’re part of a community or co-op, share copies so everyone’s on the same page.
3. Build a Go-Bag for Each Family Member
Your go-bag (or “bug-out bag”) is your grab-and-go survival kit for 3–7 days of self-reliance. Each family member (including kids!) should have one, customized to their needs. Pets too.
Typical contents include:
-
Copies of ID and essential documents (waterproof)
-
Flashlight, batteries, whistle
-
Water filtration (Lifestraw or Sawyer Mini) + 2L water
-
Portable food (high-calorie bars, jerky, dried fruit)
-
First aid kit with meds
-
Change of clothes, socks, hat, gloves
-
Fire starter (matches, lighter, ferro rod)
-
Compact emergency blanket
-
Hand-crank radio
-
Personal needs: glasses, hygiene items, baby gear
These bags should be checked and updated seasonally—especially in areas with harsh winters or scorching summers.
4. Store Supplies for Shelter-in-Place Scenarios
Some disasters require staying put. In those cases, your survival depends on your ability to maintain comfort, nutrition, safety, and power within your own walls.
Create a storage plan that includes:
-
2–4 weeks of food and water (minimum), with backup cooking and lighting
-
Warmth (heaters, blankets, wool gear)
-
Waste management (compost toilet, buckets, heavy-duty bags)
-
Communication (charged radios, solar chargers)
-
Tools to repair damage (duct tape, tarps, nails, pry bars, rope)
-
Medical preps: wound care, antibiotics, herbal tinctures, essential meds
Keep these supplies organized and inventoried, not scattered. Make it easy to find what you need—even in the dark.
5. Create a Communications and Information Plan
If phone lines are down and towers are jammed, how do you stay informed or reach loved ones?
-
Have at least one battery-powered or hand-crank NOAA weather radio
-
Create a contact list with numbers written out on paper (not just your phone)
-
Set a check-in schedule and emergency contacts outside your local area
-
Consider GMRS or HAM radios for reliable long-range comms
Bonus points for setting up a neighborhood watch or signal system if you’re building community resilience with others nearby.
6. Involve the Whole Household
This isn’t just your plan—it’s the family’s. Kids, elders, roommates, farmhands—everyone should know:
-
What to do when something happens
-
How to use the tools and preps
-
Where the safe spots and exits are
-
Who to call and when
Do practice drills. Make it a game. Build muscle memory. That’s what saves lives when panic sets in.
7. Maintain and Practice Your Plan
A plan you make once and never look at again? That’s not a plan—it’s a wish. Instead:
-
Update your hazard profile and contact list yearly
-
Restock supplies twice a year, rotating food and batteries
-
Do seasonal walk-throughs: check firewood, storm windows, fencing, etc.
-
Run practice evacuations and lockdown drills—especially with children
Preparedness isn’t paranoia—it’s prudence. And it only works if you work it.
Community Resilience and Mutual Aid
Disaster preparedness isn’t just a solo game. Whether you’re off-grid in the hills or in a semi-rural community, your survival odds and recovery speed dramatically increase with one simple thing: connection. When you build relationships before disaster strikes, you gain extra eyes, hands, skills, tools, and backup when it matters most.
This section focuses on how to foster mutual aid, create shared safety nets, and build long-term community resilience into your homestead plan.
Why Community Matters in a Crisis
Let’s be blunt: no matter how well-stocked or tough you are, you can’t do it all alone forever. Emergencies can strike while you’re injured, sick, overwhelmed, or stretched thin. That’s when a neighbor who knows your needs—or a local mutual aid group with extra supplies—can mean the difference between making it and not.
Community matters because:
-
It multiplies resources (shared tools, knowledge, and food)
-
It strengthens defense and response (watch systems, aid rotation)
-
It supports the vulnerable (kids, elders, disabled members)
-
It reduces panic and isolation during long disruptions
Think of it like an immune system—you want your network strong, responsive, and cooperative before the threat shows up.
Step 1: Get to Know Your Neighbors
Whether you're rural, suburban, or scattered in a tiny off-grid cluster, start local. Meet the folks living closest to you. Share a little about what you're working on. Ask about their skills, animals, gardens, or storage setups.
You don’t need to be best friends—just build trust and awareness.
Some ideas to break the ice:
-
Start a neighborhood tool-share or seed exchange
-
Host a casual skillshare (e.g., soapmaking, foraging, CPR)
-
Create a contact sheet for emergencies
-
Offer a helping hand when weather or illness hits
The goal is to build a web of small, solid connections—not a giant formal group.
Step 2: Form or Join a Mutual Aid Network
Mutual aid is not charity—it’s neighbors supporting each other with what they have and what they know, expecting nothing but cooperation in return.
Ways to build one:
-
Join local preparedness or permaculture groups (online or in-person)
-
Start a group text or radio circle with trusted neighbors
-
Hold a seasonal “readiness potluck” to discuss hazards and strategies
-
Keep a shared map of skills and supplies (who has what: generators, trailers, meds, tools, medical training, etc.)
-
Pool funds for shared gear or bulk supplies
These groups shine during long disruptions when store shelves are empty and help is far away.
Step 3: Plan for Roles, Rotation & Redundancy
Once you have a network, make it functional by assigning lightweight roles:
-
One person handles comms (radios, alerts, check-ins)
-
Another tracks food & water stores for sharing
-
Another keeps watch on community security or hazards
-
Rotate roles seasonally or as availability changes
This avoids burnout and makes sure no one’s overwhelmed or left out. Everyone brings something to the table—skills, strength, knowledge, or supplies.
Step 4: Share Knowledge & Skill Training
A resilient community is one where knowledge flows freely, not hoarded like gold. Use off-seasons to train together:
-
Practice group first aid
-
Build solar dehydrators or rocket stoves together
-
Run communication drills
-
Teach foraging or wildcrafting walks
-
Do mock evacuations or fire response practice
Remember: redundancy is strength. The more people who can do a thing, the safer the group.
Step 5: Include Vulnerable Community Members
True mutual aid includes the elderly, disabled, single parents, and children. Don’t leave them behind in your planning.
-
Assign buddy systems to check on at-risk folks during a crisis
-
Include their needs in evacuation or supply plans
-
Let them teach! Many older homesteaders have critical forgotten skills
Strong communities don’t just survive together—they thrive, and lift everyone up.
Preparing your homestead to withstand disasters isn't just about storing supplies—it's about designing your space to actively resist and recover from the shocks nature (or society) might throw your way. A well-thought-out property can mean the difference between staying safe in place or suffering major loss. This section helps you think critically about how to build resilience into your land, systems, and structures from the ground up.
Building for Resilience: Smart Structures Save Lives
Your first line of defense is your physical shelter. Think of your home and outbuildings as the protective shell of your self-sufficient life—they must be ready to stand against whatever hazards your region is prone to.
If you're in a flood zone or coastal area, elevating your structures is key. Homes raised on piers, posts, or earth mounds can stay high and dry even if floodwaters rise. In wildfire territory, keep defensible space around buildings—clear brush, install ember-resistant vents, and build with fire-retardant materials like metal roofing, cement board siding, or even cob or earthbag walls that don’t easily catch flame. In tornado or hurricane regions, reinforcing doors and windows, anchoring roofs, and adding storm shelters may save lives. For earthquake zones, prioritize flexibility—wood frames, seismic bracing, and a low center of gravity help buildings sway without collapsing.
No matter where you live, think like a systems designer. What’s likely to go wrong, and how do you build in ways that absorb the hit instead of cracking under it?
Food, Water, and Power Redundancy: Layer Your Lifelines
The golden rule of off-grid preparedness is simple: never rely on just one of anything. One water source can dry up. One power system can fail. One type of food can spoil.
Start by mapping out your critical needs—water, food, energy—and look for backup plans. If your solar panels are your main energy source, do you have a generator with stored fuel? Do you have a battery bank large enough to ride out a week of storms? Could you supplement with a micro-hydro or wind turbine?
For water, maybe your primary supply is a rain catchment system—but do you have access to a well, a spring, or at least a way to haul and filter emergency water? A gravity-fed backup or hand pump can mean the difference between comfort and crisis.
Food stores should cover multiple timeframes: short-term (fresh and refrigerated), mid-term (canned, dried, root cellared), and long-term (freeze-dried, vacuum-sealed, sealed grains). Grow what you can, store what you can’t, and make sure you can cook or preserve even if the grid goes down.
Resilient homesteaders don’t count on luck—they build layers of protection, knowing that systems fail, but redundancy buys time and safety.
Off-Grid Communication: Stay Connected When It Matters Most
When cell towers go dark and the internet vanishes, how will you call for help, share updates, or get news?
Every resilient homestead should have at least one way to communicate that doesn’t rely on the grid. CB radios, handheld HAM radios, and GMRS walkie-talkies can connect you with neighbors or emergency responders. Mesh networks—local wireless signals that connect device-to-device—can carry messages without needing outside infrastructure. Some satellite messengers even allow brief texts when there's no signal at all.
It’s not just about calling for help—it’s about knowing when a threat is coming. A solar-powered NOAA weather radio with alert tones can warn you about approaching hurricanes, wildfires, or extreme heat. These tools can give you precious minutes—or even hours—of lead time to act.
Fireproof Safes, Bug-Out Bags, and Escape Routes: The Last Line of Defense
Even the most hardened homestead may one day need to be evacuated. Fire jumps barriers. Floods rise. Civil unrest turns ugly fast. If you had to leave in under 10 minutes, would you be ready?
Install a fireproof, waterproof safe for essential documents: ID, deeds, medical info, emergency cash. Build and maintain a go-bag—a backpack loaded with three days’ worth of food, water, first aid, clothes, power banks, and tools. Make one for every person in your household, including pets.
Have multiple escape routes planned and practiced. If the front road is blocked by downed trees or fire, what’s plan B? Map it, drive it, walk it if needed. Every member of your household should know where to go and how to get there.
It’s also smart to store copies of key documents digitally on a USB drive or encrypted cloud. Redundancy applies here too—back up what matters, because when disaster hits, it’s too late to wish you had.
Emergency Planning for Families
A well-prepared homestead starts with well-prepared people—and that means every family member, from toddlers to teens to elders, knows the plan and feels like a part of it. Emergency planning isn’t about scaring your loved ones—it’s about empowering them. When a crisis strikes, chaos shrinks in the face of clarity, and the best thing you can do for your family is to give them a plan they understand, trust, and can act on.
Bug-In vs. Bug-Out: Know When to Stay or Go
One of the biggest decisions in any emergency is this: do you shelter in place, or do you leave?
Bugging in means staying put—securing your home, locking things down, and riding it out. If your home is structurally sound, your supplies are stocked, and the threat isn’t immediate (like a pandemic, ice storm, or civil unrest), staying put is often the safest choice. You have control. You have resources. You don’t want to be caught out on the road with no plan and thousands of others panicking.
Bugging out, on the other hand, is a last resort. If staying puts you in direct danger—like a fire at your doorstep, a chemical spill, or a fast-approaching hurricane—you get out. And fast. The key here is that the decision is made before the adrenaline kicks in. You don’t wait until the flames are at the fence. You act on triggers you’ve pre-decided: “If the fire reaches X,” or “If the water rises to Y,” or “If the order comes from Z authority.”
Smart homesteaders always plan for both—because emergencies don’t follow scripts.
Family Roles & Communication Plans
Every member of the family has a part to play. Clear roles reduce stress and confusion, especially when time is tight or emotions run high.
Start by assigning responsibilities: Who grabs the go-bags? Who checks the animals? Who turns off the power or water? Who helps the kids or elders?
Then set up a communication plan. What if you get separated? Have a central meeting spot and at least two backups. Write down phone numbers, addresses, and radio channels in physical form—don’t rely on phones that might lose power or signal.
For off-grid families, consider a low-cost walkie-talkie system or GMRS radios to stay in touch over short distances. Teach your kids how to use them, and make it fun—they’re more likely to remember it under pressure.
Maps, Documents, Go-Bags, and Medical Kits
Your plan should include physical tools, not just mental notes.
Keep printed maps of your area and the routes you might need to take. GPS isn’t always reliable in a crisis. Mark safe houses, fuel stops, and hazard zones.
Make sure each family member has a go-bag ready to grab. This should include:
-
Water, snacks, and a basic mess kit
-
Flashlight, radio, batteries or solar charger
-
Weather-appropriate clothes, poncho, and hygiene supplies
-
Cash, ID, and important documents (or copies)
-
First-aid supplies and medications
-
Copies of family emergency plans and contacts
And don’t forget a separate household medical kit that stays on-site, fully stocked with:
-
Bandages, antiseptics, tweezers, splints
-
OTC meds (pain relievers, allergy meds, etc.)
-
Critical prescription meds (with rotation to keep them fresh)
-
Emergency medical guides and tools for off-grid care
You’re not just planning to survive—you’re planning to remain functional, capable, and calm when others are not.
Emergency Drills: Making It Fun, Not Frightening
Running emergency drills doesn’t have to be a grim affair. In fact, it shouldn’t be. The more your family sees these drills as part of life—not a doomsday dress rehearsal—the more ready they’ll be when the real thing comes knocking.
Do regular “surprise” drills: “Let’s say the fire’s coming—go!” and see how fast everyone can grab bags, load pets, and get to the vehicle.
Do nighttime drills where everyone has to move with flashlights. Or make it a game with prizes: fastest to pack, cleanest medical bandage, best improvised shelter.
Let your kids “lead” drills sometimes—it builds their confidence. Let elders practice giving directions. Run animal evacuation trials. Practice shut-off procedures for power, water, and propane. Make it second nature.
These drills don’t just build muscle memory. They build family trust. They show your household that you’ve thought it through. That they have power in their hands. And that whatever comes next—you’ll face it together.
Making Informed Decisions in Crisis
In a real emergency, your biggest tool isn’t your go-bag or generator—it’s your ability to think clearly under pressure. When adrenaline is flooding your system and everything feels like it’s happening at once, being able to pause, assess, and act wisely can be the difference between safety and disaster.
This section teaches the mental side of preparedness: how to stay calm, make good calls, and avoid the trap of doing too much—or too little—at the wrong time.
Decision-Making Under Pressure: How to Stay Grounded
Stress does weird things to our brains. It narrows our focus, shortens our memory, and cranks up emotion. That’s not failure—it’s biology. The trick is to work with your stress responses instead of letting them run the show.
Train yourself to use a simple grounding question in a crisis:
"What is the single most important thing I can do right now to increase safety?"
That question cuts through noise and chaos. It helps you prioritize. It keeps you moving forward when everything around you is stuck in panic.
Another helpful habit: take a breath—literally. One deep inhale, one full exhale. It signals to your body that you’re in control. That’s sometimes all it takes to bring the thinking brain back online.
Mental rehearsal helps too. Before emergencies happen, talk through scenarios: “If the fire’s on the ridge, what would I do? Where would I go?” You’re not obsessing. You’re building neural pathways. That way, when the time comes, your body already knows the drill.
Risk Assessment: Cost vs. Benefit in Action
In an emergency, every decision has trade-offs. Moving too soon can expose you to danger. Waiting too long can trap you. The key is understanding the risk/benefit balance and adjusting based on real-time info—not fear.
Ask:
-
What is the likely consequence if I stay?
-
What is the likely consequence if I go?
-
What do I know right now—and what don’t I?
-
Is there time to gather more information, or must I act now?
Practice using a “red/yellow/green” system in your mind:
-
Green: All clear—no immediate risk, stay the course.
-
Yellow: Something's off—monitor closely, prepare to act.
-
Red: Action needed now—go, shut down, evacuate.
Simple systems like this help you override emotional overload with structured thinking. It’s not just smart—it’s survival-minded.
Prioritizing: What to Save, What to Leave, What to Do First
Not everything can come with you. Not every task can be done. Sometimes you have ten minutes—or ten seconds—and you have to triage your decisions.
Here’s a general rule of thumb:
-
People First: Yourself, your family, and those in your care—always the first priority.
-
Critical Tools: Communications gear, IDs, meds, go-bags.
-
Livelihood Essentials: If time allows—hard drives, cash, business-critical gear, legal papers.
-
Sentimental Items: If and only if the rest is secured.
Practicing this in advance makes it easier to accept in the moment. You’ll know what matters most, and you’ll waste less time grabbing things you don’t actually need.
Also key: task triage. What do you do first when the sirens go off or the storm hits?
-
Shut off gas or power?
-
Grab the go-bag?
-
Load the animals?
-
Get to the storm shelter?
Plan your order of operations ahead of time, and even tape the list inside your front door or on your prep cabinet. It takes the guesswork out when seconds count.
Avoiding Panic: Mental Preparation & Scenario Planning
Panic is not just fear—it’s paralysis. It’s the brain short-circuiting because it didn’t see this coming. The best way to avoid panic? See it coming.
Scenario planning is not doom-scrolling. It’s walking through possibilities with a clear head so you can build muscle memory before you ever need it.
Practice saying out loud:
“If X happens, then I’ll do Y.”
“If we lose power and the fridge dies, then we move the cold items to the root cellar.”
“If we get separated, then we all head to the barn meeting point.”
This keeps panic out by replacing it with actionable steps.
Another vital tip: debrief after drills or close calls. Talk as a family. What went well? What was confusing? What do we change? This isn’t about blame—it’s about learning, adjusting, and getting better together.
Lastly, remember that mental strength is like physical strength: it’s built in small reps. The more you practice, the calmer you’ll be. And calm people in a crisis become anchors. Be the anchor.
Preparedness as a Way of Life
You’ve stocked the go-bags, mapped out escape routes, and practiced your emergency plans—but now what? The real strength in preparedness isn’t just about surviving a one-time event. It’s about building a resilient, responsive lifestyle where readiness is woven into your everyday habits.
This is where our students step into true homesteader confidence—not just reacting, but thriving with awareness, self-reliance, and calm consistency.
Rotating and Restocking Supplies
Food, water, batteries, medications—they all expire. So storing them once and forgetting about them? That’s a false sense of security.
The key to maintaining emergency supplies is rotation. Think of it like a pantry with a longer time horizon.
-
Use what you store.
-
Store what you use.
This means keeping track of expiration dates, cycling out older items, and updating your inventory every few months. Some people check their supplies with the change of each season. Others tie it to the start of daylight saving time. Find a rhythm that works for your household.
For food: rotate canned goods and dried staples regularly, and keep a log of what you use.
For water: swap out stored water at least once every 6–12 months.
For gear: check batteries, solar chargers, and radios to make sure they still function as intended.
Make it a routine, not a chore—and involve the whole family if you can.
Staying Updated on Regional Risks
Just because you’ve done your initial research doesn’t mean you’re set for life. Risks evolve. Weather patterns shift. Construction upstream could affect flooding. A new factory or rail line nearby could introduce new threats.
Set a reminder twice a year to recheck local hazards:
-
FEMA floodplain maps
-
Wildfire risk zones
-
Earthquake fault lines
-
Local industrial zones
-
Infrastructure changes (like new dams, chemical plants, or power stations)
Sign up for text or email alerts from your county emergency management department. Some regions also offer NOAA weather radio feeds or community-wide alert systems.
And don’t forget to keep an eye on seasonal updates—things like early snowmelt, drought forecasts, or wildfire danger levels. The more you know, the better you can pivot.
Building Mutual Aid Networks and Community Plans
No matter how prepared you are personally, you’re stronger with allies. Community resilience is one of the most underappreciated parts of emergency preparedness—and one of the most powerful.
This doesn’t mean you have to be best friends with every neighbor, but you should know:
-
Who around you might need help in a crisis (like elders, disabled folks, or young families)
-
Who has skills to share (like medical training, mechanics, comms tech, or animal handling)
-
Who already has tools and resources (like extra storage space, generators, or first aid supplies)
Create a basic “who to check on / who to team with” list. If you’re part of a neighborhood group, church, co-op, or school, raise the topic of mutual aid at a meeting. Even a shared phone tree or group message thread can become a lifeline in a disaster.
Remember: strong communities don’t just survive—they rebuild faster, bounce back stronger, and carry each other through.
Teaching Kids and Elders Without Fear
Preparedness isn’t just for grown-ups. Your kids, your parents, and your grandparents all have roles to play—and they need to be brought in without panic or overwhelm.
For kids:
-
Frame drills as games (“Let’s see how fast we can grab our go-bags and get to the barn!”).
-
Use stories and visual cues.
-
Involve them in inventory checks and food rotation.
For elders:
-
Make instructions clear and easy to follow.
-
Pre-pack medications or mobility tools.
-
Discuss communication plans gently and respectfully, reminding them it’s about safety—not worry.
Everyone in your family should know:
-
Where to go
-
Who to call
-
What to bring
-
How to act if the main decision-makers are unavailable
You’re not preparing your family for fear—you’re preparing them to feel safe, capable, and calm, no matter what.
Tools, Checklists, and Resources
*** We are still creating some of the resources that we intend to include here, so some of the links in this section may not work yet ***
When the lights go out, the storm is closing in, or the world feels sideways, there’s one thing that makes all the difference: clarity. Clear thinking. Clear steps. Clear tools.
And that clarity often starts with a good checklist.
You’ve absorbed a lot of information in this lesson—maybe more than you thought possible when you started. But learning is just the beginning. Now we translate knowledge into actionable tools—resources that can live in your go-bag, hang by your door, or sit on your shelf waiting for the day you need them.
These tools aren’t just for emergencies. They’re for peace of mind on normal days too.
Regional Disaster Risk Reference Sheets
Different locations face different threats. A homestead in the Ozarks isn’t preparing for the same challenges as one in coastal Texas or the Pacific Northwest. That’s why it’s so important to know what your region is up against—and keep that information accessible.
We’ll be including printable reference pages organized by region and disaster type, covering:
-
Common natural and industrial hazards
-
Seasonal risk patterns
-
Historical events to learn from
-
Local emergency contact numbers and online alert systems
These will help you stay grounded in what’s actually likely where you are, and make sure you’re not wasting energy on threats you’ll never face.
DOWNLOAD Your Regional Disaster Risk Reference Sheets
Emergency Supply and Go-Bag Inventory Lists
Whether you're bugging in or bugging out, the gear you pack ahead of time can be the difference between calm and chaos. But we don’t believe in packing like preppers on reality TV—we believe in customized, logical supplies that match your life.
We’ll provide:
-
A basic “72-hour go-bag” checklist
-
An extended 2-week “shelter-in-place” list
-
A build-your-own bug-out bin system for homesteads
-
Specialty kits (for kids, elders, pets, livestock, and medical needs)
These are written to be practical and realistic. No fluff, no fantasy gear—just what you actually need, organized in a way that helps you prep fast and rest easy.
Download Your Emergency Supply and Go-Bag Inventory Check Lists
Communication, Navigation & Power Backup Guides
If the grid is down and the phone towers are quiet, how will you talk to your people? How will you get updates—or get out?
This part of your preparedness plan covers:
-
Off-grid communication tools (two-way radios, mesh systems, emergency frequencies)
-
Printed maps and compass basics
-
Backup power for small electronics (solar chargers, hand cranks, battery banks)
Even if you never use these tools, just knowing how gives you power in a powerless situation.
Download Your Communication, Navigation & Power Backup Guides
Trusted Resource Libraries
We’ve pulled together a curated list of links, guides, and references so you don’t have to dig for them when you need them most.
You’ll find:
-
FEMA and NOAA interactive maps
-
Local emergency management directories
-
Medical preparedness books
-
Practical guides from Red Cross, CERT, and USDA
-
Suggested podcasts, radio stations, and off-grid YouTube channels
Download Your Disaster Preparedness Resource Guide
Plus, we’ll include all these resources in the resource section of your curriculum, so they are easy to find when you need them.
Preparedness isn’t about memorizing everything. It’s about setting up systems that support you when thinking clearly is hardest. These tools are part of that system.
Once your tools are in place and your checklists ready to go, you won’t just feel prepared—you will be.
Lead with Calm, Prepare with Purpose
You’ve just completed one of the most comprehensive, no-nonsense disaster preparedness guides out there—and not the kind that sugarcoats things. We’ve covered fire, flood, storms, heat, cold, earthquakes, civil unrest, pandemics, grid failures, even volcanoes and invasive species. And why? Because you can’t build a truly self-sufficient life without also preparing for the worst.
But here’s the thing: this wasn’t about scaring you. This was about giving you power.
Every section in this lesson has offered not just warnings, but solutions. You now know how to assess your region, plan for your family, prepare your land, and protect your home. You know how to think clearly in a crisis, organize your gear and plans, and adapt to long-term changes like climate shift and ecological strain. You’ve gone beyond just survival—you’ve stepped into resilience. Into leadership. Into becoming the kind of person others look to when things go sideways.
Yes, there’s a lot to remember. But you don’t have to do it all overnight. Resilience is built layer by layer. The more prepared you are, the more calm you bring into the storm. You’ll make smarter decisions, waste fewer resources, and sleep better at night knowing you’ve done what most never even attempt.
So take a deep breath. You’ve faced the fires, floods, quakes, and chaos—and you came out clearer, stronger, and ready.
From Prepped to Powerful
Take a moment to let this sink in—because you didn’t just read your way through a stack of “what-ifs” and “worst-cases.” You faced the hard stuff. You learned how to prepare your family, your home, your land, and most importantly, your mindset for whatever might come your way. That’s not something most people are willing to do.
You’ve stepped into the role of protector, strategist, and resilient community builder. Not through fear—but through foresight. That takes guts, heart, and a whole lot of brainpower.
There’s no cape, no badge, no sirens to let the world know you’re ready—but you are. You’ve just laid the groundwork for becoming the person people look to when everything else starts falling apart.
And now… it’s time to shift from surviving disaster to building your dream.
In the next lesson, "First Aid and Emergency Medical Preparedness," we shift from responding to disasters to caring for the people who live through them—starting with you and your loved ones. You’ll learn how to confidently handle everyday injuries, off-grid emergencies, and worst-case scenarios when help might be far away.
From wound care to wildlife encounters, medication management to infection control, this next step gives you the practical, life-saving skills every off-grid homesteader needs in their back pocket. You’ll even build your own off-grid medical plan, complete with symptom charts and red flag checklists.
Because true preparedness doesn’t end with food and firewood—it means knowing what to do when things go wrong inside the human body, too.
You’ve built your stronghold—now let’s make sure everyone inside it stays safe.
Audio
Video