Cold Climates: Keeping Composting & Anaerobic Systems Thriving all Winter
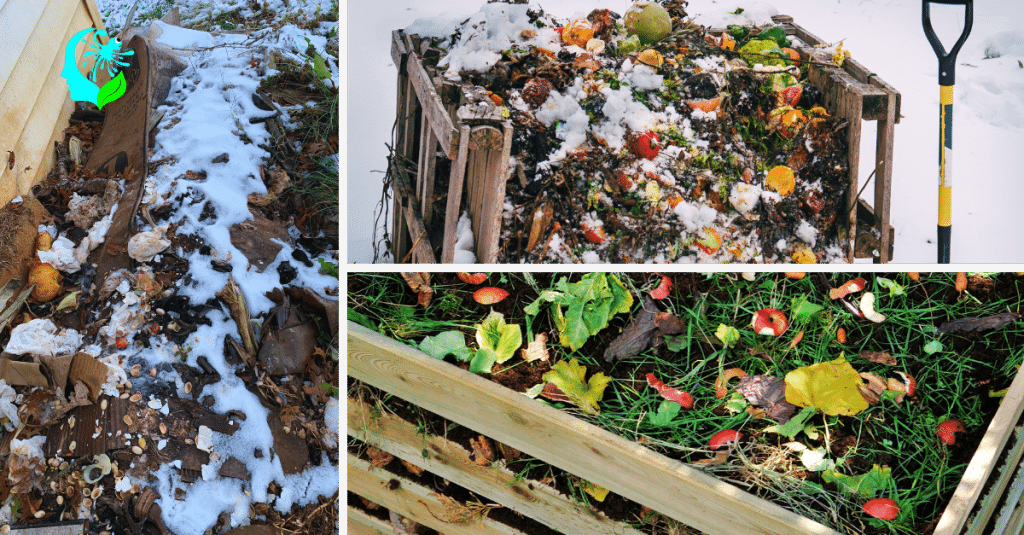
Don't let winter stop your composting! Even in freezing temperatures, decomposition continues as psychrophilic bacteria take over. Create large, well-insulated piles with straw or leaves, position them strategically against south-facing walls, and manage moisture properly to keep your system active year-round.
Key Takeaways
- Composting continues even in freezing temperatures, though at a slower rate as psychrophilic bacteria take over below 68°F
- Larger compost piles (at least 3 feet in each dimension) retain more heat and resist freezing, making them ideal for winter composting
- Proper insulation with straw, leaves, or finished compost creates a protective barrier that maintains core temperature in cold weather
- UpRooted Greens provides expert guidance on maintaining active decomposition systems throughout the winter months
- Strategic positioning against south-facing walls and proper moisture management are crucial for winter composting success
The Science Behind Winter Decomposition
When temperatures drop, many gardeners mistakenly assume that composting must wait until spring. This simply isn't true. Winter composting is not only possible but can be highly productive with the right approach.
Composting doesn't stop in cold weather—it simply changes pace. As temperatures fall below 68°F, the microbiological dynamics of your compost pile undergo a fascinating shift. The thermophilic bacteria that dominate during warmer months give way to psychrophilic bacteria, which are specially adapted to function in colder conditions. These cold-loving microorganisms continue the decomposition process, albeit at a slower rate than their heat-loving counterparts.
This scientific understanding is essential for successful winter composting. By working with these natural biological processes rather than against them, you can maintain an active compost system even when temperatures plummet. UpRooted Greens has developed courses that teach these these biological principles to keep composting systems thriving year-round.
1. How cold affects bacterial activity
The rate of decomposition in your compost pile directly correlates with bacterial activity. As external temperatures drop, the metabolic rate of decomposer microorganisms slows. This doesn't mean decomposition halts entirely—it simply requires more time and specific conditions to continue efficiently.
In temperatures below freezing, the process can essentially pause until the next thaw. However, with proper management, the core of a well-maintained compost pile can remain active even when the outer layers are frozen. This is because decomposition itself generates heat, creating a self-sustaining environment that can continue to function despite frigid external conditions.
2. Temperature thresholds that matter for compost
Understanding the critical temperature thresholds for composting can help you maintain an active pile throughout winter:
- Above 68°F (20°C): Mesophilic bacteria thrive, breaking down materials at a moderate pace
- Below 68°F (20°C): Psychrophilic bacteria become dominant, continuing decomposition at a slower rate
- Below 32°F (0°C): Surface activity may stop, but the interior of a properly sized pile can remain active
The goal of winter composting is to maintain as much internal heat as possible, allowing decomposition to continue even when external temperatures are freezing. This is why proper pile size, insulation, and management become especially crucial during colder months.
3. The Role of Psychrophilic Bacteria Below 68°F
As temperatures drop below 68°F (20°C), the compost pile transitions from being dominated by mesophilic and thermophilic organisms to a new set of microbial workhorses—psychrophilic bacteria. These cold-loving microorganisms aren't just survivors; they're specialists, capable of sustaining decomposition even in temperatures that would slow or stall most biological activity.
Psychrophilic bacteria thrive in conditions between 32°F and 68°F (0°C to 20°C), with some strains remaining active just above freezing. While they work more slowly than their heat-loving counterparts, they are critical for keeping microbial life alive in the pile when ambient air temperatures dip below freezing.
These bacteria perform many of the same functions as mesophiles:
-
Breaking down carbohydrates, proteins, and fats
-
Feeding on plant residues, food scraps, and manure
-
Generating small amounts of heat as a metabolic byproduct
In well-insulated or sufficiently large piles, the collective metabolic heat from psychrophilic activity can maintain a viable internal temperature—even if the outer layers freeze. This self-generated warmth becomes a crucial lifeline for maintaining microbial momentum throughout winter.
Supporting psychrophilic bacteria involves:
-
Maintaining adequate oxygen levels by turning the pile periodically in the fall
-
Avoiding overwatering which can create anaerobic pockets they can’t thrive in
-
Continuing to add nitrogen-rich materials in moderation to feed their slower metabolism
-
Protecting the core with carbon-based insulation to shield their activity from deep cold
By understanding and supporting these microscopic allies, composters can keep the biological engine running through the coldest months—ensuring that spring begins with an active, healthy pile rather than a frozen block of unfinished waste.
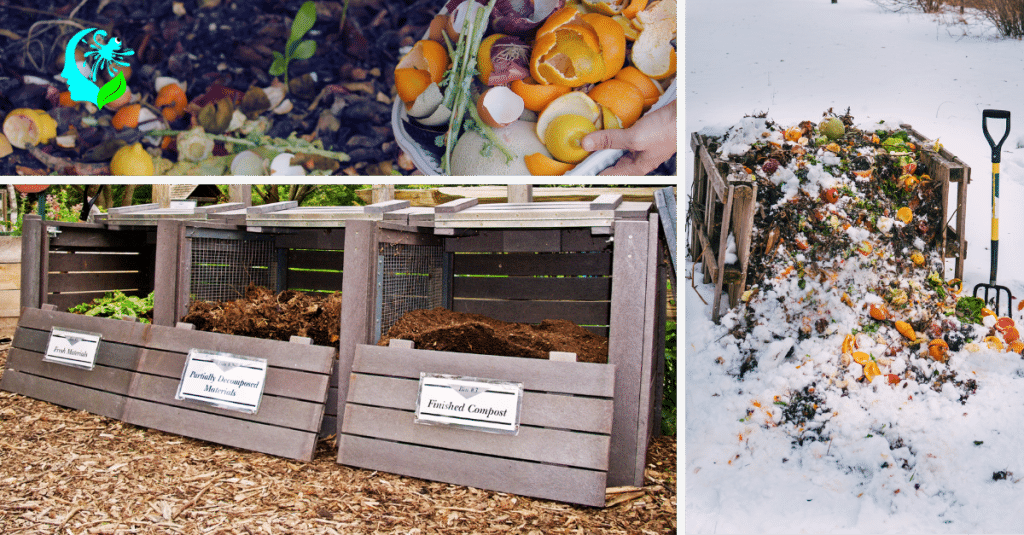
Preparing Your Outdoor Compost System for Winter
Size matters significantly when it comes to winter composting. A larger pile generates and retains more heat, keeping the decomposition process active even in freezing temperatures. Before winter sets in, consider increasing the size of your compost pile to create a more resilient system.
1. Scaling up: Why bigger piles survive better
In winter composting, volume becomes your greatest ally. A larger mass provides better insulation, protecting the vital core where most decomposition occurs. For cold-weather composting, aim for a pile that's at least 3 feet wide, 3 feet deep, and 3 feet tall—though going up to 5 feet in each dimension can provide even better results.
When a compost pile reaches sufficient size, it creates its own microclimate. The outer layers may freeze, but they act as insulation for the still-active center. This is why many successful winter composters consolidate multiple smaller piles into one larger mass before the cold sets in.
2. Strategic location selection
The location of your compost system significantly impacts its winter performance. Look for spots that offer natural protection from harsh elements while maximizing exposure to whatever winter warmth is available.
Ideal locations include:
- Against south-facing walls that absorb and radiate solar heat
- Areas protected from prevailing winds
- Spots that receive maximum winter sunlight
- Locations easily accessible even after snowfall
- Places with good drainage to prevent waterlogging
Many gardeners find that placing compost bins against heated buildings provides additional warmth. Garages, barns, or house walls can serve as thermal masses, slowly releasing heat to nearby compost systems.
3. Essential pre-winter maintenance steps
Before winter arrives, perform these crucial maintenance tasks to prepare your compost system:
- Turn the pile thoroughly one last time to incorporate oxygen and activate decomposition
- Remove any finished compost from the bottom of the pile
- Check moisture levels—aim for the consistency of a wrung-out sponge
- Add a generous layer of high-carbon materials (browns) to the top as insulation
- Consider installing a compost thermometer to monitor internal temperatures
This preparation creates optimal conditions for the slower winter decomposition process and positions your system for success despite challenging conditions.
Effective Insulation Techniques for Cold Climates
Proper insulation is perhaps the most crucial aspect of winter composting. It serves the dual purpose of retaining heat generated by microbial activity while protecting the pile from freezing temperatures and excessive moisture.
1. Natural materials for thermal protection
Several readily available materials provide excellent insulation for winter compost systems:
- Straw bales arranged around the perimeter create an effective wind barrier and insulating layer
- Fallen leaves packed around and on top of the pile provide natural, free insulation
- Finished compost acts as an excellent insulating layer while introducing beneficial microorganisms
- Wood chips create air pockets that provide insulation while allowing some airflow
- Cardboard can be used to line bin walls for additional protection
Layer these materials strategically around your compost system, focusing on the sides and top where heat loss occurs most rapidly. Some composters even create double-walled systems with insulating material packed between the walls.
2. Creating windbreaks and barriers
Wind significantly accelerates heat loss from compost piles. Creating effective windbreaks can substantially improve your compost system's ability to maintain temperature in winter.
Effective windbreak options include:
- Temporary structures made from pallets and tarps
- Snow walls packed around the compost bin
- Dense evergreen branches stacked on the windward side
- Permanent wooden structures built on the north and west sides
Even in urban settings, creative windbreaks can be constructed using recycled materials or temporary seasonal structures that protect your compost from winter's chill.
3. Moisture-proof covering systems
While moisture is necessary for decomposition, excess water can be problematic in winter composting. Too much moisture displaces oxygen and can lead to anaerobic conditions, while also increasing the risk of the entire pile freezing solid.
Implement these covering systems to manage moisture effectively:
- Install a pitched roof that allows snow and rain to run off
- Use breathable covers like burlap that shed water while allowing airflow
- Consider semi-permeable tarps that prevent saturation but allow some air exchange
- Create a simple hinged lid for easy access despite snow accumulation
The goal isn't to completely seal the pile but to control moisture levels while maintaining adequate airflow. This balance becomes especially critical during freeze-thaw cycles typical of many winter climates.
Specialized Winter Composting Methods
When temperatures drop, specialized composting approaches can help maintain decomposition activity. These methods are specifically designed to overcome the challenges of cold-weather composting.
1. Hot composting strategies for freezing temperatures
Hot composting—a technique that relies on maintaining temperatures between 130-150°F inside the pile—remains viable even in winter with proper management. This approach accelerates decomposition and can effectively process materials even when outdoor temperatures are freezing.
To maintain a hot compost pile in winter:
- Start with a large volume of materials all at once (at least one cubic yard)
- Maintain the proper carbon-to-nitrogen ratio (about 25-30:1)
- Chop materials into smaller pieces to accelerate breakdown
- Add activators like alfalfa meal, blood meal, or a small amount of finished compost
- Monitor internal temperature with a compost thermometer
- Insulate thoroughly with straw bales or other materials
Hot composting requires more active management but rewards with faster processing and the ability to continue composting through even the coldest months.
2. Adapting compost tumblers for winter use
Tumbler composting systems offer advantages in winter due to their contained design, but they also present unique challenges since their smaller volume can lead to faster cooling. With some adaptations, tumblers can remain effective throughout the cold season.
Winter modifications for compost tumblers include:
- Placing the tumbler in a sunny, sheltered location
- Wrapping the exterior with insulating materials like bubble wrap or old blankets
- Adding hot water bottles or rocks that have been warmed in the oven
- Processing materials in smaller batches but more frequently
- Turning less often to retain heat
Some dedicated winter composters even relocate their tumblers to partially heated spaces like garages or garden sheds during the coldest months.
3. Trench composting beneath the snow
Trench composting—burying organic materials directly in the soil—becomes an especially valuable technique in winter. The soil provides natural insulation, and materials break down slowly over time, enriching the soil for spring planting.
The trench composting process for winter:
- Dig trenches in fall before the ground freezes (8-12 inches deep)
- Add food scraps and other compostables throughout winter
- Cover each addition with at least 6 inches of soil
- Mark trench locations for easy finding under snow
- Plant directly above these nutrient-rich zones in spring
This method requires minimal maintenance and works silently beneath the snow, preparing your garden beds for spring while processing winter kitchen waste.
Managing Food Waste Collection in Winter
Collecting food waste during winter presents unique challenges, from frozen collection bins to limited access to outdoor composting systems. With thoughtful systems in place, you can maintain the flow of organic materials to your compost throughout the cold season.
1. Kitchen scraps storage solutions
Maintaining an efficient collection system for kitchen scraps ensures consistent feeding of your compost pile even during inclement weather.
Effective winter collection strategies include:
- Using a countertop compost bin with a tight-fitting lid and charcoal filter
- Employing a two-container system—a small countertop collector that's emptied into a larger bin kept in the garage or mudroom
- Designating a dedicated 5-gallon bucket with a lid for less frequent trips to the main compost pile
- Installing a through-the-wall chute system if your compost bin is located against an exterior wall
These approaches minimize trips to outdoor compost systems during harsh weather while preventing odor issues indoors.
2. Freezing techniques to prevent odors
Freezing food scraps until you're ready to add them to your compost offers multiple benefits in winter, including odor control and preservation of nutrients.
To implement a freezing system:
- Designate a container specifically for compost in your freezer
- Fill it with kitchen scraps until it's convenient to visit your compost pile
- Allow the scraps to thaw slightly before adding to outdoor systems
- Use freezing to store scraps during extended periods of extreme cold
This approach is particularly valuable during stretches of severe weather when accessing your outdoor compost system may be difficult or impossible.
3. Proper burial methods in cold compost piles
When adding kitchen scraps to winter compost piles, proper burial techniques prevent pest issues and speed integration into the existing materials.
Best practices for adding scraps to winter compost:
- Dig a hole in the center of the pile where temperatures are highest
- Add food scraps and immediately cover with existing compost materials
- Layer in additional carbon-rich browns on top of freshly added greens
- Consider pre-mixing kitchen scraps with browns before adding to the pile
- Add materials in smaller, more frequent batches rather than large additions
These techniques help maintain pile temperature and ensure that even in cold conditions, new materials integrate properly into the composting process.
Maintaining the Right Material Balance
1. Optimal Carbon-to-Nitrogen Ratios for Cold Weather
In cold-weather composting, getting the carbon-to-nitrogen ratio (C:N) right is more important than ever. The microbes working through winter—especially psychrophiles—are slower, more sensitive to environmental shifts, and less forgiving of imbalances. If the ratio is off, decomposition may stall completely.
The Sweet Spot: 25:1 to 30:1 Still Applies
Even in winter, your target C:N ratio remains the same as during warmer seasons—around 25–30 parts carbon to 1 part nitrogen by weight. This provides:
-
Fuel (carbon) for microbial metabolism
-
Protein (nitrogen) for cell growth and reproduction
-
Moisture balance when materials are properly layered
-
Odor control by preventing excess nitrogen from off-gassing as ammonia
Why Balance Matters More in Winter
-
Too much nitrogen (too “green”) and you risk soggy, smelly piles that freeze into anaerobic blocks
-
Too much carbon (too “brown”) and the pile may stay too dry, cold, and slow-moving for microbes to function
-
The cold slows microbial correction mechanisms, so your initial ratio matters more than in summer
Unlike in warm weather, you don’t get as many chances to fix problems after the fact. That’s why pre-mixing or pre-layering materials before winter really kicks in can help maintain steady decomposition throughout the season.
Quick Reference by Volume
Since few of us weigh our compost ingredients, use this visual volume ratio as a cold-climate guide:
-
3–4 parts browns (carbon): dried leaves, shredded paper, straw, wood chips
-
1 part greens (nitrogen): food scraps, manure, grass clippings, coffee grounds
Mix these materials thoroughly rather than layering them in thick bands—this prevents hot or cold pockets and ensures psychrophilic bacteria have access to the right fuel everywhere in the pile.
2. Stockpiling Browns for Winter Use
One of the biggest winter composting mistakes? Running out of browns. During the growing season, nitrogen-rich “greens” like food scraps and manure are easy to come by. But when fall ends and the leaves stop falling, many homesteaders find themselves short on the carbon materials needed to balance their pile.
The solution? Strategic stockpiling.
What to Stockpile
High-carbon “brown” materials to store for winter include:
-
Shredded leaves (bag them in fall while dry)
-
Straw or hay (keep under cover to stay dry)
-
Shredded paper and cardboard (avoid glossy or plastic coatings)
-
Sawdust or wood shavings (great for moisture absorption)
-
Dried grass clippings (only if pesticide-free)
-
Chopped corn stalks or dried garden waste
How to Store Browns Through the Cold Months
Proper storage is key to making these materials usable throughout winter:
-
Store dry. Moisture encourages premature decomposition and mold.
-
Use breathable containers. Paper yard bags, bins with ventilation holes, or burlap sacks work well.
-
Keep off the ground. Elevate bags or bins on pallets to avoid moisture wicking.
-
Protect from snow and rain. A tarp-covered corner of the shed, garage, or porch works great.
Pro tip: If you shred or chop materials before storing them, they’ll decompose more efficiently when added to the pile during freezing temperatures.
Brown Buffer = Winter Compost Survival
Stockpiled browns let you:
-
Maintain optimal C:N balance no matter how much food waste you’re generating
-
Layer and bury new additions (especially smelly ones) without scavenger risk
-
Insulate fresh scraps inside a carbon-rich buffer, supporting heat retention
-
Avoid the scramble for carbon-rich material when everything outside is frozen solid
Think of your brown stockpile as your composting emergency fund—you may not need it every day, but when you do, it saves your pile from freezing, stalling, or going anaerobic.
3. Processing Materials for Faster Decomposition
In winter composting, time and temperature are working against you. So if you want decomposition to continue in cold conditions, you’ll need to give your microbes a head start by making the materials they eat easier to digest.
The best way to do that? Pre-process everything you add to the pile.
Why Smaller Is Better
Microbes don’t have teeth. The smaller the material, the more surface area available for microbial colonization—and the faster it breaks down.
Especially in winter, this helps:
-
Speed up heating, so the pile retains warmth
-
Prevent cold zones, where large, slow-rotting chunks cool the pile
-
Keep oxygen flowing, since finely chopped materials blend and aerate more easily
-
Avoid material “clumps” that resist decomposition or freeze together
Cold-Weather Processing Methods
Here are simple tools and techniques to break down your compost inputs before they go in the pile:
-
Chop kitchen scraps with a knife or food processor
-
Shred leaves and paper using a lawnmower, chipper, or office shredder
-
Break twigs or stalks into short pieces with pruners or loppers
-
Blend small batches of wet scraps with water to create a “compost smoothie”
-
Pre-soak dry browns if they’re too brittle to mix evenly
For larger setups, a manual chipper or pedal-powered shredder can turn dry stalks and stems into fast-composting material even in subzero weather.
Bonus Tip: Pre-Mix Your “Meals”
In cold weather, mixing greens and browns before adding them to the pile can:
Stabilize the C:N ratio right away
Encourage immediate microbial activity
Help prevent odors or freezing by distributing moisture evenly
Think of it like meal prep for your microbes—they’ll thank you with faster, more consistent decomposition, even in the snow.
Indoor Composting Alternatives
1. Vermicomposting Systems for Year-Round Use
When outdoor piles are frozen solid and trudging through snow is more survival mission than chore, vermicomposting offers a low-effort, high-return solution for year-round composting—right inside your home.
Vermicomposting uses red wiggler worms (Eisenia fetida) to break down food scraps and bedding materials into nutrient-rich worm castings. These castings are one of the most potent and microbially active soil amendments available—especially valuable for starting spring seedlings or revitalizing tired indoor plants.
Why Worms Thrive Indoors in Winter
Red wigglers prefer temps between 55°F–77°F—which makes basements, utility rooms, pantries, and garages ideal habitats during winter. Unlike outdoor piles that rely on microbial heat, worm bins just need stable room temps and consistent moisture to keep working.
Even in small homes or apartments, worm bins can be:
-
Kept under sinks or in closets
-
Housed in stackable trays or DIY totes
-
Used with minimal odor or mess if managed properly
Choosing or Building a Winter Worm Bin
Popular systems include:
-
Commercial stackable trays (like Worm Factory or Hungry Bin)
-
DIY bins made from Rubbermaid totes with drainage and air holes
-
Vertical tower systems for small spaces
-
Bucket-in-bucket systems for mobile setups or cabins
Essentials for winter success:
-
Bedding: shredded newspaper, cardboard, coconut coir, or partially decomposed leaves
-
Moisture: bedding should feel like a wrung-out sponge
-
Aeration: allow for air flow but avoid drafts
-
Drainage: leachate must be collected or drained to avoid soggy conditions
-
Covering: use a breathable cloth lid or secure screen
Winter Feeding Tips
Worms slow down a bit in colder months, so feed lightly and avoid overloading. Best practices:
-
Chop scraps finely or pre-freeze to soften them
-
Avoid citrus, onions, dairy, meat, or greasy food
-
Bury food under bedding to prevent fruit flies
-
Watch moisture—frozen food adds water as it thaws
If cared for properly, your indoor worm colony will process scraps all winter long—and multiply in spring, giving you more castings and more worms to expand your system or share with neighbors.
2. Bokashi Fermentation for Kitchen Waste
Bokashi isn't technically composting—it's fermentation. But when winter hits and traditional composting slows to a crawl, this airtight, odor-controlling method becomes a powerful tool for handling kitchen waste indoors with minimal fuss.
Originating in Japan, Bokashi uses bran inoculated with beneficial microbes (primarily lactic acid bacteria, yeasts, and phototrophic bacteria) to ferment organic material in an anaerobic environment. The process is fast, clean, and perfect for small spaces—even apartments or RVs.
How Bokashi Works
-
Food scraps (yes, even meat and dairy!) are added to a sealed bin
-
Each layer is sprinkled with Bokashi bran or spray
-
The lid is sealed tightly to keep oxygen out
-
After 1–2 weeks, the contents are fully fermented (not rotted)
-
The “pre-compost” is then buried, added to a compost pile, or used in special soil factories
Unlike traditional composting, Bokashi doesn’t require turning, moisture management, or carbon-to-nitrogen ratios. It simply needs:
-
A sealed bin with a drainage spout
-
Bokashi inoculant (store-bought or homemade)
-
A consistent input of kitchen waste
-
Occasional draining of Bokashi tea (the fermented liquid byproduct)
Why It’s Ideal for Winter
-
No need for warmth or airflow—the process is anaerobic and works well at room temp
-
Fast processing—most scraps ferment in 7–14 days
-
Great for hard-to-compost items—meat, dairy, bones, and citrus all go in
-
Compact & odor-free when sealed correctly
-
Indoor-safe—can be stored in kitchens, closets, basements, or pantries
The fermented material doesn’t look like compost—it’s soft, acidic, and slightly sour-smelling—but once added to a warm soil environment (like a spring compost pile or trench), it breaks down rapidly and enriches the soil.
Making Your Own Bokashi Bran
For the DIY homesteader, Bokashi bran can be made by inoculating:
-
Wheat or rice bran
-
With molasses and water
-
Plus Effective Microorganisms (EM-1) or a homemade lacto-ferment
-
Then drying the mixture and storing it for later use
This keeps the cost down and lets you process food waste even in the dead of winter—turning scraps into nutrient-dense material instead of frozen garbage.
3. Hybrid Indoor–Outdoor Approaches
For many homesteaders, the most resilient composting strategy in winter isn't strictly indoors or outdoors—it’s a hybrid approach that leverages the strengths of both environments. By combining indoor prep and processing with outdoor decomposition, you can keep your nutrient cycle moving even when snow is on the ground and your pile is buried under a tarp.
The Hybrid Workflow in a Nutshell
-
Indoors:
-
Collect and store food scraps (freezing, fermenting, or pre-chopping)
-
Use vermicomposting or Bokashi to pre-process scraps
-
Stockpile and mix carbon-rich browns in a dry, covered area
-
-
Transition Point:
-
During mild spells or sunny days, transfer materials outside
-
Add to a central pile or trench and bury immediately with browns
-
Use hot water, compost activators, or “starter layers” to jumpstart activity
-
-
Outdoors:
-
Consolidate into a large, insulated winter compost heap
-
Maintain with minimal turns and strategic feedings
-
Insulate with leaves, straw, or snow, and monitor with a thermometer
-
Why This Works
-
Indoors, you're preserving nutrient density, preventing pests, and keeping smells contained.
-
Outdoors, you're enabling large-scale decomposition with thermal mass and microbial diversity.
-
Together, they let you compost consistently year-round without overloading any single system.
This approach also allows for seasonal flexibility:
-
Vermicompost indoors during deep cold
-
Add to outdoor compost pile during thaws
-
Use Bokashi during busy or sub-zero weeks
-
Restart full outdoor composting the moment spring hits
Example Setups
-
Kitchen > Worm Bin > Outdoor Pile
-
Countertop Bin > Bokashi > Trench Composting
-
Freezer > Compost Tumbler > Raised Bed Fill
These strategies work especially well in rural areas where outdoor access is possible—but they also suit urban homesteaders with limited space who want to maximize every scrap.
Hybrid systems aren’t just practical—they’re resilient, allowing composters to adapt to changing weather, workloads, and household rhythms without losing momentum.
Adjusting Your Maintenance Schedule
1. When to Turn (and When Not To)
In warm months, turning your compost pile every couple of weeks helps aerate it, speed up decomposition, and keep odors in check. But in winter? The rules shift.
Turning a winter compost pile too often can actually cause more harm than good. Every time you turn the pile, you risk releasing precious internal heat—and that heat is what keeps microbial activity going in cold conditions.
When Not to Turn
Avoid turning your pile when:
-
Temperatures are consistently below freezing
-
The internal pile temperature is still warm and steady
-
You're trying to preserve heat from recent additions
-
The pile is frozen solid (turning won't help and can break tools)
Turning during these times can stall decomposition and waste the microbial heat that’s been building in the core.
When to Turn (Strategically)
Do turn your pile when:
-
A mild thaw creates soft outer layers you can mix
-
The pile smells anaerobic (like sulfur or rotten eggs)
-
There are signs of compaction or water saturation
-
You're adding a large batch of food scraps and want to integrate it
-
You notice the core temperature dropping—a light turn may help reheat it
When you do turn in winter, aim for a gentle fork-over, not a full remix. Just enough to blend in fresh material or reintroduce air pockets. Then, insulate well afterward with straw, leaves, or a layer of finished compost to seal the heat back in.
Pro Tip:
Use a compost thermometer to check temps before and after turning. If your core temp drops dramatically after mixing, back off the turning schedule until spring.
2. Monitoring Moisture Levels in Freezing Conditions
Compost microbes, like all living things, need water to survive. But in winter, managing moisture becomes a balancing act between too much, which leads to freezing and rot, and too little, which halts decomposition altogether.
The cold slows everything down, including evaporation, so any added moisture tends to stick around longer than usual.
The Winter Moisture Challenge
-
Too Wet? You risk freezing the entire pile into a solid block, choking out oxygen and microbial life.
-
Too Dry? Decomposition slows or stops as microbes go dormant without enough hydration.
-
Just Right? Your pile should feel like a wrung-out sponge—damp but not dripping, even in cold temps.
How to Monitor Moisture in Winter
-
Check by Hand (if not frozen)
On warmer days or during thaws, reach into the middle and grab a handful. It should hold together loosely and feel damp but not soggy. -
Use a Moisture Meter
These inexpensive tools can give a rough reading without digging too much. Just make sure it’s rated for outdoor/wet conditions. -
Watch for Ice Formation
Ice on the outside edges or pooling around the bottom often means your pile is waterlogged. It’s time to add dry browns like shredded leaves, straw, or sawdust. -
Insulate Against Snow Melt
Covering your pile helps shed snow and rain. A tarp with ventilation or a layer of carbon materials on top keeps moisture from overwhelming your pile.
Tip:
If your region experiences freeze–thaw cycles, you may find your pile soggy one week and dry the next. Don’t be afraid to adjust in small increments—add dry browns when it’s wet, and sprinkle in water or moist greens when things get brittle and dry.
3. Temperature Checking in Winter Piles
Monitoring the internal temperature of your compost pile in winter is the best way to know if it’s still actively decomposing or if it has stalled out. Since you can’t always rely on visual cues when the outer layers are frozen solid, temperature becomes your go-to diagnostic tool.
Why Temperature Matters
Composting is essentially a biological furnace. When active, microbial activity creates heat—often enough to keep the internal pile cozy even during freezing weather. But if the temperature drops too low for too long, decomposition slows or stops entirely.
Here's what different temperature ranges can tell you:
-
130–150°F (55–65°C) – Hot composting zone. Rapid decomposition, good pathogen and seed destruction.
-
80–130°F (27–55°C) – Moderate activity. Still composting, just more slowly.
-
40–80°F (4–27°C) – Slow or cold composting. Likely relying on psychrophilic bacteria.
-
Below 40°F (4°C) – Activity is minimal. Below freezing, only the center may remain active—if at all.
Tools for Temperature Monitoring
-
Compost Thermometer
Long-probe thermometers (20" or more) are ideal. Stick it deep into the center and check weekly. If it reads in the hot or warm zones, you’re golden. -
DIY Stick Test
In a pinch, push a metal rod or broom handle into the center of the pile. Leave it for 5 minutes, pull it out, and feel the tip:-
Warm? Your pile is still active.
-
Cold? It might be time to turn it, insulate more, or bulk it up.
-
-
Thermal Imaging (Advanced)
For those with access to thermal cameras or apps, this can give a full view of heat distribution. Not essential, but a neat tech-savvy trick if you’re into automation or data tracking.
Practical Notes
Always check in the center of the pile, not the frozen crust.
Use readings to guide your actions—if temps drop, consider adding nitrogen-rich material or more insulation.
Remember: Even if the temp drops low, the pile can reactivate in spring and resume right where it left off.
Troubleshooting Common Winter Composting Problems
1. Dealing with Completely Frozen Piles
So, you walk out to check your compost and discover it’s frozen solid—like a rock-hard, icy brick of banana peels and last month’s leaf clippings. Don’t panic. A frozen compost pile isn't dead, it's just hibernating.
Why Piles Freeze
Compost piles freeze when:
-
They're too small to generate enough internal heat.
-
They're not well-insulated.
-
They're overly wet, allowing cold to penetrate deeper.
-
Decomposition has already slowed to a crawl due to poor material balance.
It’s common for the outer layers to freeze, but if the entire pile turns solid, microbial activity grinds to a halt.
What To Do About It
You have a few options depending on your setup and goals:
-
Wait It Out
The simplest method is to let the pile freeze and do nothing. Come spring, it will thaw, and the microbes will pick up where they left off. During the freeze, continue collecting kitchen scraps in a holding bin or freeze them until it's time to resume composting. -
Insulate & Consolidate
If the freeze just set in, add insulation fast—straw bales, finished compost, or leaves—around and on top of the pile. If possible, combine smaller piles into one larger mass to restore heat-building volume. -
Hot-Start It Again
Add a layer of nitrogen-rich materials (manure, coffee grounds, fresh greens) and turn the pile. This oxygenates the center and adds fresh fuel. Cover it immediately to help trap any heat that begins to build. -
Use a Solar Trap
Drape a black tarp or heavy-duty plastic over the pile to absorb sunlight during the day and hold in heat at night. Even in winter, solar gain can make a measurable difference.
What Not to Do
-
Don’t add water – Wet material freezes faster and stays frozen longer.
-
Don’t dig in daily – Repeatedly opening the pile lets heat escape and disrupts any internal microclimate.
-
Don’t abandon composting altogether – Keep collecting materials. Just shift your method temporarily (e.g., indoor bins, trench composting, or bokashi).
A frozen compost pile isn't a failure—it’s a seasonal pause. With some planning, insulation, and patience, it’ll bounce back stronger than ever.
2. Managing Excess Moisture from Snow and Ice
Winter is sneaky. One day, your compost pile is perfectly moist and humming along—and the next, it’s waterlogged from melting snow, sleet, or a surprise warm spell. Excess moisture is one of the biggest threats to winter composting success.
Why Too Much Moisture Is a Problem
When your pile gets too wet, it loses the oxygen that microbes need to do their job. The pile can turn anaerobic, leading to:
-
Slowed or stalled decomposition
-
Unpleasant odors (think swampy, not earthy)
-
Frozen sludge that’s impossible to turn
-
Matting and compaction that chokes airflow
Winter-Specific Moisture Sources
-
Melting snow piling on the top
-
Rain or sleet getting in through open tops or loose covers
-
Drip zones from overhanging roofs or trees
-
Condensation from sudden temperature swings
How to Prevent Waterlogging
-
Cover the Pile Strategically
-
Use a breathable tarp or burlap sacks to shield the pile while still allowing airflow.
-
Avoid completely sealing the pile with plastic—that can trap humidity inside.
-
-
Pitch It Like a Roof
-
Shape the top of the pile into a rounded or peaked form so water rolls off instead of pooling.
-
Even better—add a physical roof or lean-to if your region gets heavy snow.
-
-
Elevate the Base
-
Place the pile on coarse material (like wood chips or sticks) or on a pallet platform to improve drainage.
-
Avoid building directly in low-lying areas that collect runoff.
-
-
Add Browns Regularly
-
Layer in dry carbon materials like shredded leaves, straw, or sawdust to absorb excess moisture.
-
Keep a stash of dry browns nearby specifically for this purpose.
-
-
Build a Drainage Trench (Advanced)
-
In particularly wet climates, dig a shallow trench around your composting zone to divert runoff away from the pile.
-
Quick Winter Moisture Check:
Grab a handful from the pile's middle (not the frozen edges). If it drips when you squeeze it, it’s too wet. Add dry browns and mix if possible—gently in winter to avoid releasing too much heat.
Even in snowy climates, with the right protections and regular checks, your compost pile can stay balanced and breathable.
3. Identifying and Fixing Odor Issues in Cold Weather
Let’s be real—winter composting shouldn’t stink. If you get a whiff of something rotten, swampy, or sour, it’s not just the cold air making your nose more sensitive. It’s your compost pile sending up a distress signal.
Common Winter Odors & What They Mean
-
Rotten eggs or sulfur smell → Indicates anaerobic (oxygen-deprived) conditions
-
Sour or acidic smell → Likely too much nitrogen (greens) and not enough carbon (browns)
-
Garbage or decay smell → Could mean exposed food scraps or poor burial practices
-
Ammonia smell → Often from too much manure, urine, or other high-nitrogen input
Why It Happens More in Winter
In cold weather:
-
People tend to add more kitchen waste than carbon materials, especially around holidays.
-
Turning the pile becomes infrequent, reducing oxygen.
-
Wet conditions from snow and sleet lead to compaction and trapped gases.
-
The pile’s outer layers may freeze, forming a barrier that locks in smells.
Fixing the Funk: Winter Edition
-
Add Browns, and Then Add More
Dry, absorbent carbon materials like shredded leaves, straw, sawdust, or paper soak up excess moisture and rebalance nitrogen-heavy mixes. -
Gently Aerate When Possible
Use a compost aerator or garden fork to poke holes into the core if the pile isn’t frozen solid. This allows oxygen to reach the microbes without releasing core heat. -
Bury Kitchen Scraps Properly
Always dig a small hole in the active core and cover scraps with compost material or browns immediately. Surface dumps = odor bombs. -
Check Moisture Balance
If your pile is soggy, it may be both cold and anaerobic. Fix with dry browns and protective covers as discussed previously. -
Insulate the Right Way
Don’t just throw a tarp over it and hope. Use breathable insulation (like straw bales or leaves) to regulate both temperature and airflow.
If the Pile Is a Lost Cause…
If the odor just won’t quit and the pile is frozen solid, don’t stress. Pause additions, let it freeze, and resume maintenance during a thaw. In the meantime, collect scraps indoors (freeze them or use bokashi/vermicomposting systems), then add in batches when the pile is active again.
From Compost to Garden: Year-Round Benefits Worth the Effort
Winter composting connects seasons, transforming autumn's abundance and winter's kitchen waste into spring garden fertility. This continuous cycle builds soil health year after year.
The effort invested in winter composting yields multiple rewards:
- Continued waste reduction year-round
- Production of finished compost ready for spring planting
- Maintenance of beneficial microorganism populations
- Earlier spring garden readiness
- Improved soil structure and fertility
- Reduced need for purchased amendments
By maintaining composting through winter, you create a resilient, sustainable system that benefits your garden and the environment in all seasons. The challenges of winter composting are real, but the rewards are worth the effort.
UpRooted Greens can help you maintain thriving compost systems in all conditions, offering resources and support for year-round composting success.
Frequently Asked Questions: Winter Composting Edition
Q: Can compost really keep working in freezing temperatures?
A: Yes, absolutely! As long as the core of the pile stays insulated and large enough, decomposition continues inside even when the outer layers freeze. Psychrophilic bacteria take over when it drops below 68°F and keep things moving—just more slowly. It’s not a myth. It’s microbial resilience.
Q: How big should my compost pile be to work in winter?
A: Aim for at least 3 feet x 3 feet x 3 feet, but bigger is better. A mass of that size creates thermal inertia—a fancy way of saying it holds heat better. Larger piles build their own cozy microbial microclimates even in deep cold.
Q: What if my compost pile freezes solid? Is it ruined?
A: Not at all! A frozen pile isn’t dead—it’s just napping. Composting will pick up right where it left off as soon as it thaws. In the meantime, collect scraps indoors or try bokashi or vermicomposting to keep waste out of the trash.
Q: Should I turn my pile in winter?
A: Only if the weather is warm enough and the pile isn’t frozen. Turning can help introduce oxygen and speed things up, but unnecessary turning can release precious internal heat. Use a compost thermometer to check before you dig.
Q: What materials are best for insulating my compost pile?
A: Straw bales, dry leaves, finished compost, wood chips, or even cardboard all make great insulation. Surround the pile on all sides and top it off with a thick insulating layer to trap heat in and keep cold winds out.
Q: Can I compost meat or dairy in the winter?
A: Best to avoid it in open systems. Meat, dairy, and oils break down best in hot compost or bokashi systems, but they can attract pests and smell bad in under-active piles. In cold months, stick to plant-based scraps unless you’ve got an advanced setup.
Q: Is it worth the effort to compost in winter?
A: Yes—and not just for waste reduction. By keeping your pile active, you’ll have finished compost ready for spring, preserve beneficial microbes, and avoid the “spring startup delay.” Winter composting is the quiet MVP of four-season soil fertility.
Q: What’s the easiest winter composting method for beginners?
A: Trench composting and freezing scraps indoors until weather permits are great entry points. If you want something more active but still easy, try an insulated bin near your house or a worm bin indoors.
Composting Through the Cold Is a Radical Act of Resilience
Winter composting isn’t just about waste—it’s about willpower. When you commit to nurturing soil life through snow, ice, and freezing winds, you’re not just keeping scraps out of the trash—you’re building fertility, self-reliance, and something the grid can’t sell you: independence.
At UpRooted Greens, we know the quiet power of compost. It’s not flashy. It doesn’t shout. But it transforms everything from the ground up.
Got questions? We’ve got answers—especially the kind that don’t come in a plastic bag.
Book your consultation at www.UpRootedGreens.com/book-a-call
Or drop us a line anytime at [email protected]
Join the UpRooted Greens Discord community to connect with other cold-season compost champions.
You’re not just composting. You’re cultivating a future. And you don’t have to do it alone!